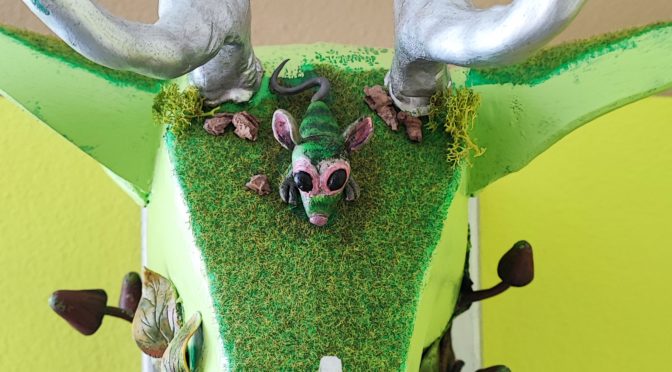
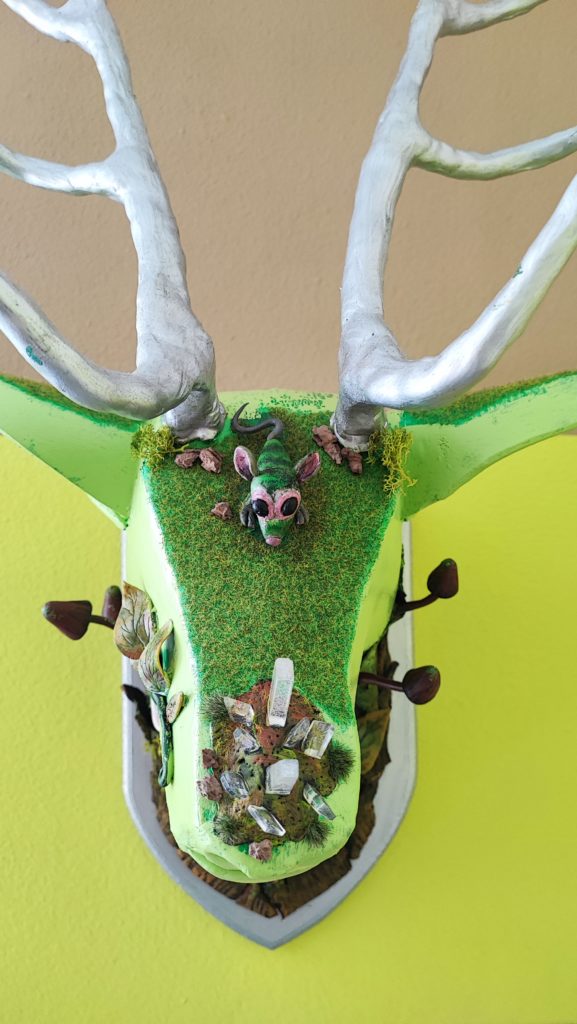
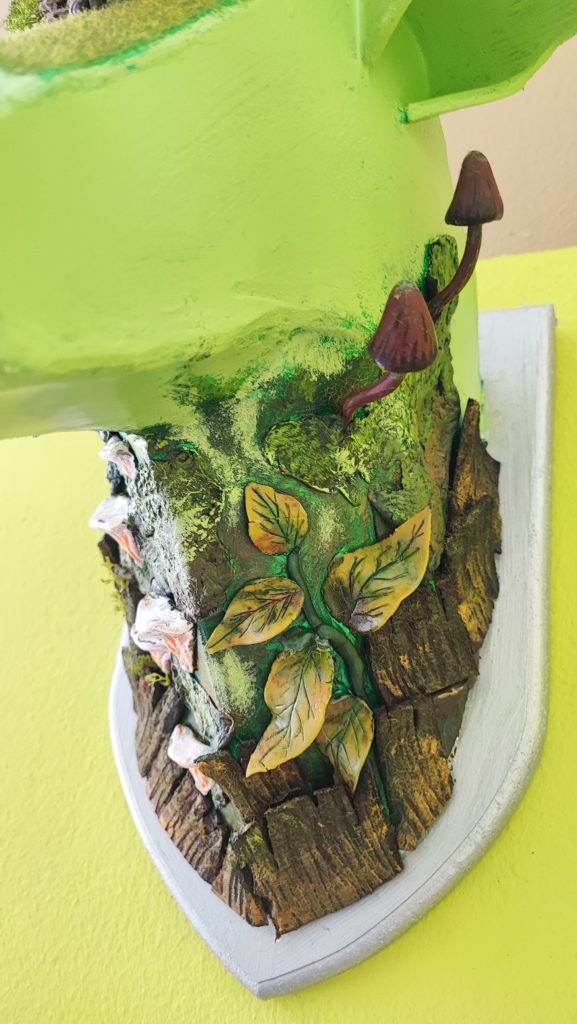
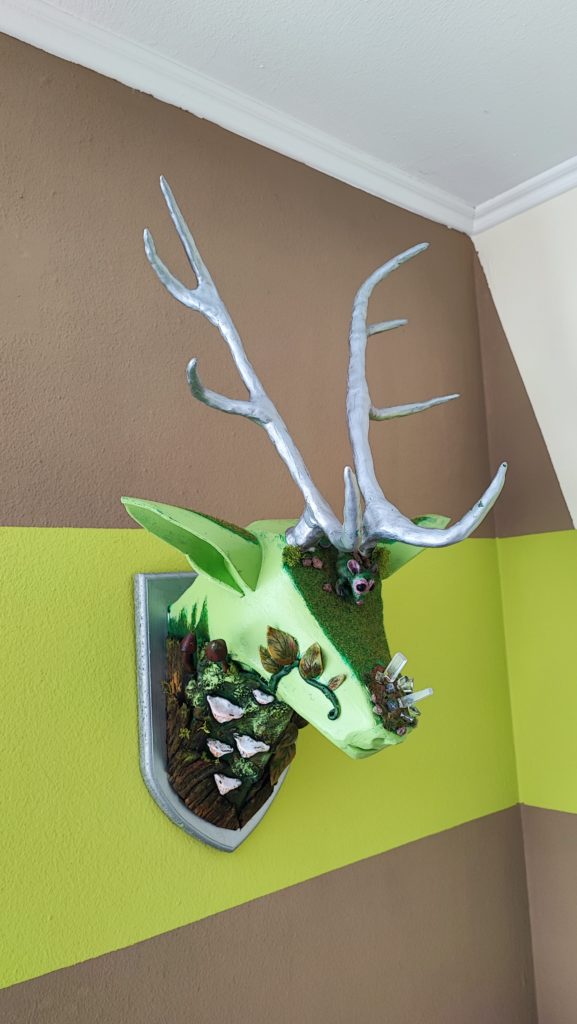

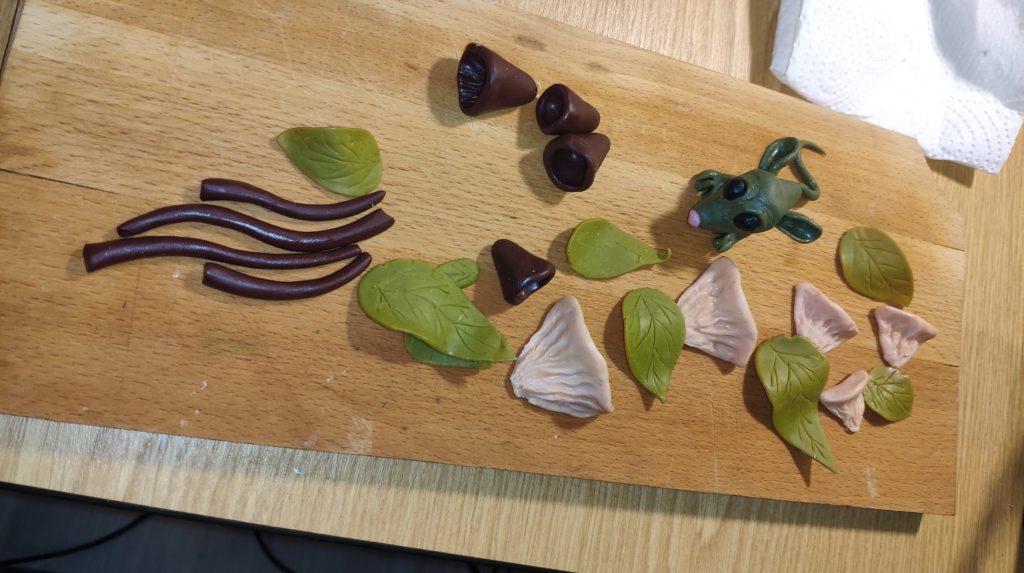
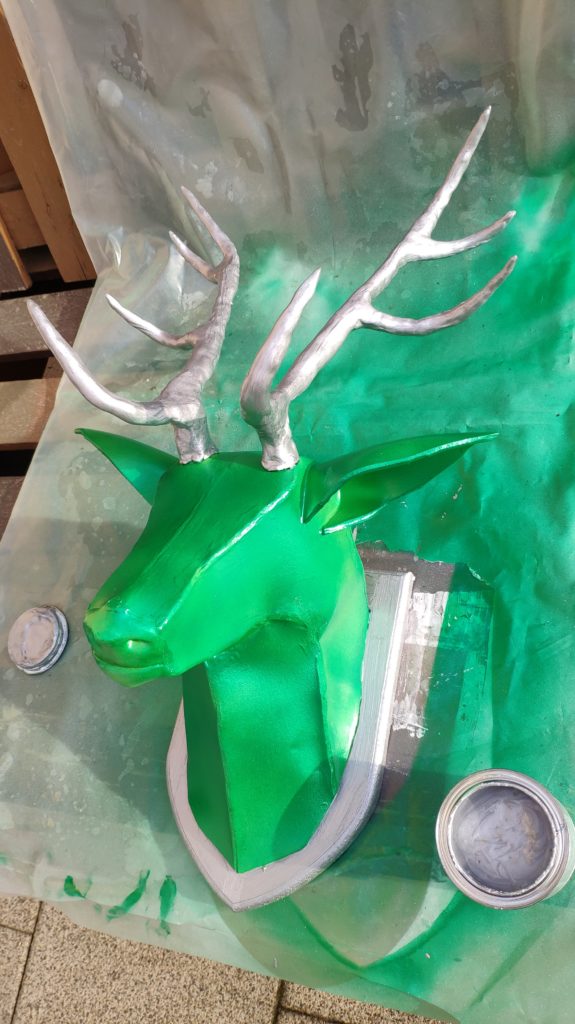
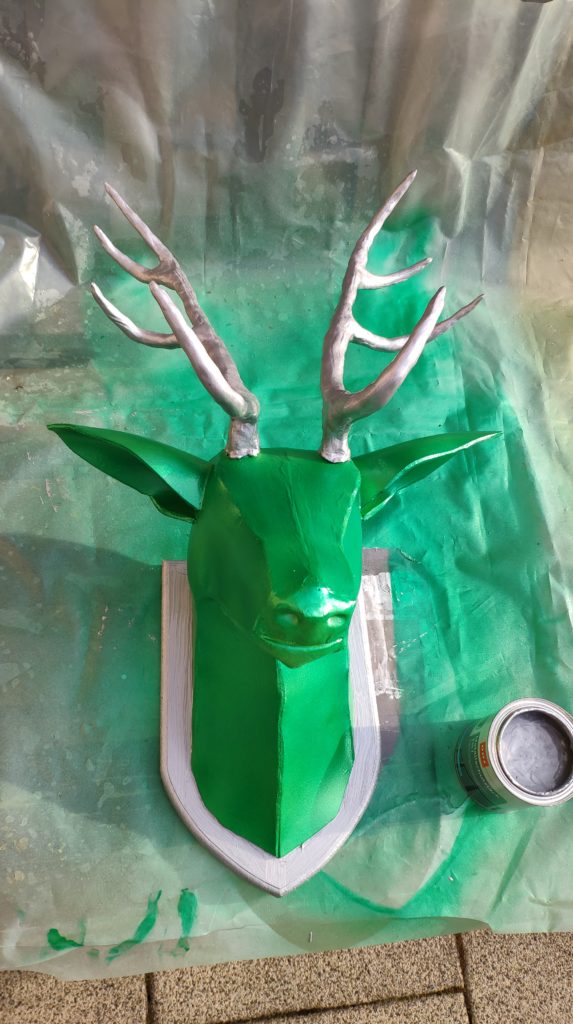
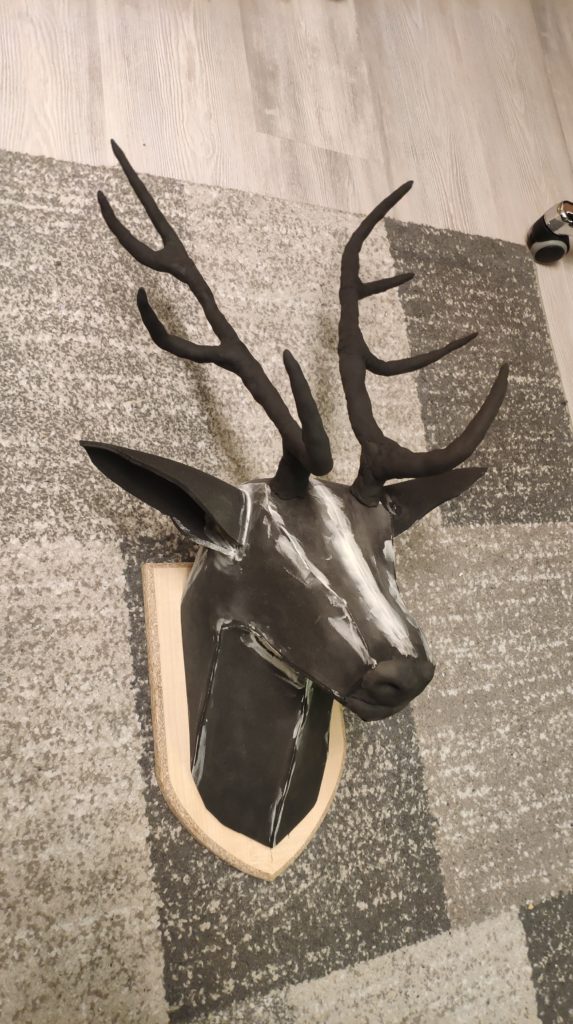
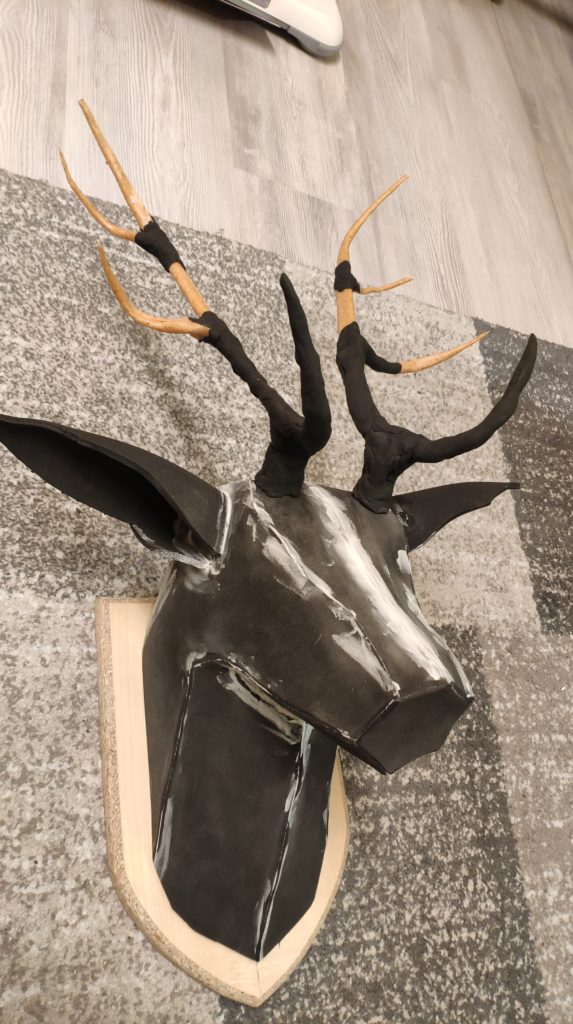
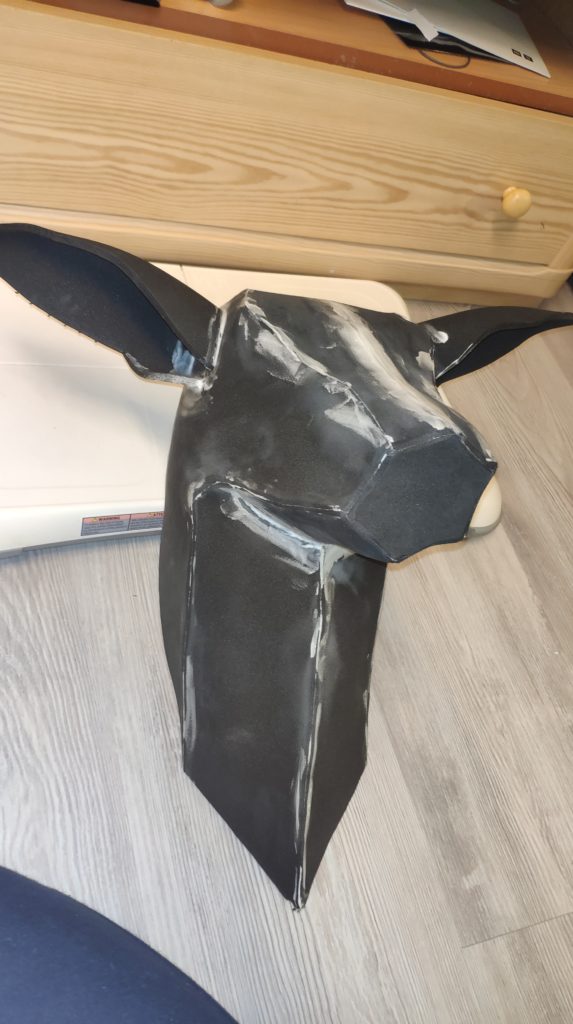
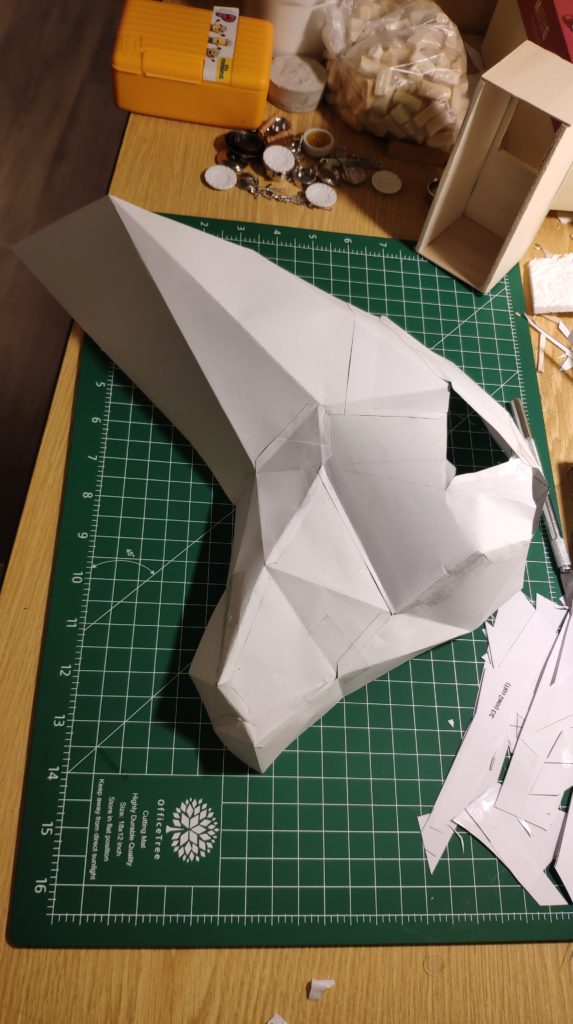
Another project. A deer trophy also for my living room. Actually here I was trying a lot of techniques from worbla, eva foam, epoxy resin, car paints etc…
Category Archives: Painting

Custom smart lamp
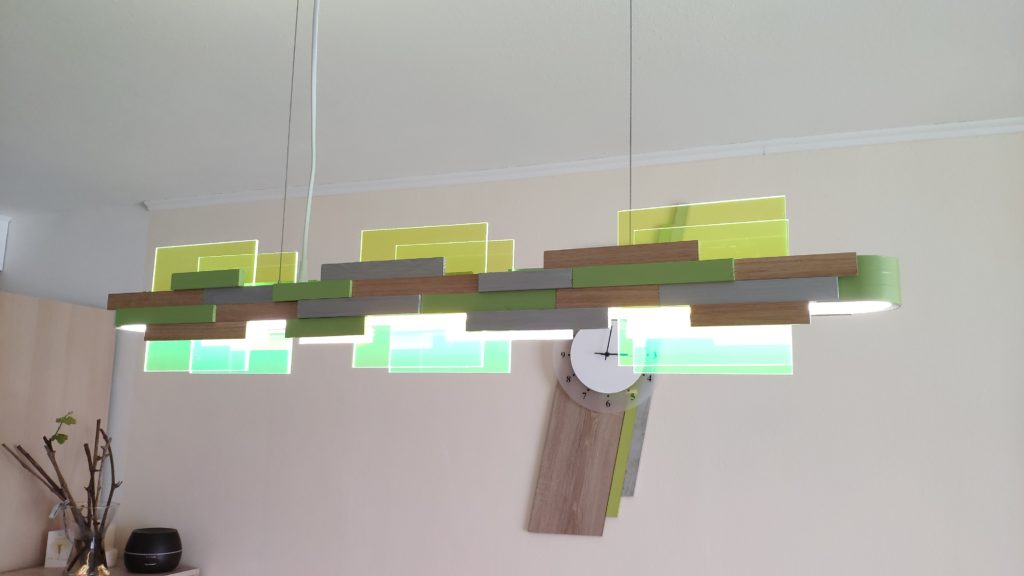
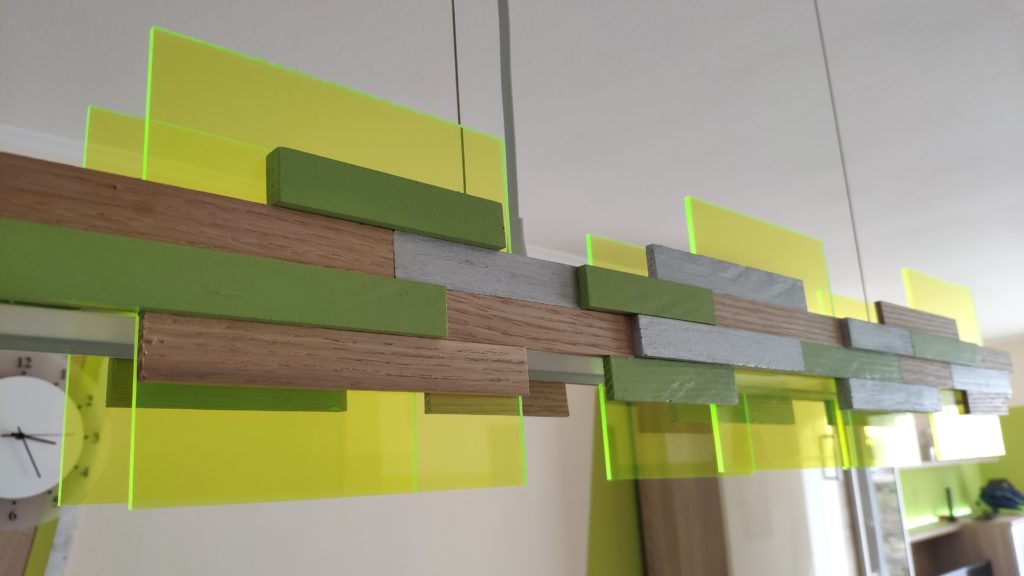
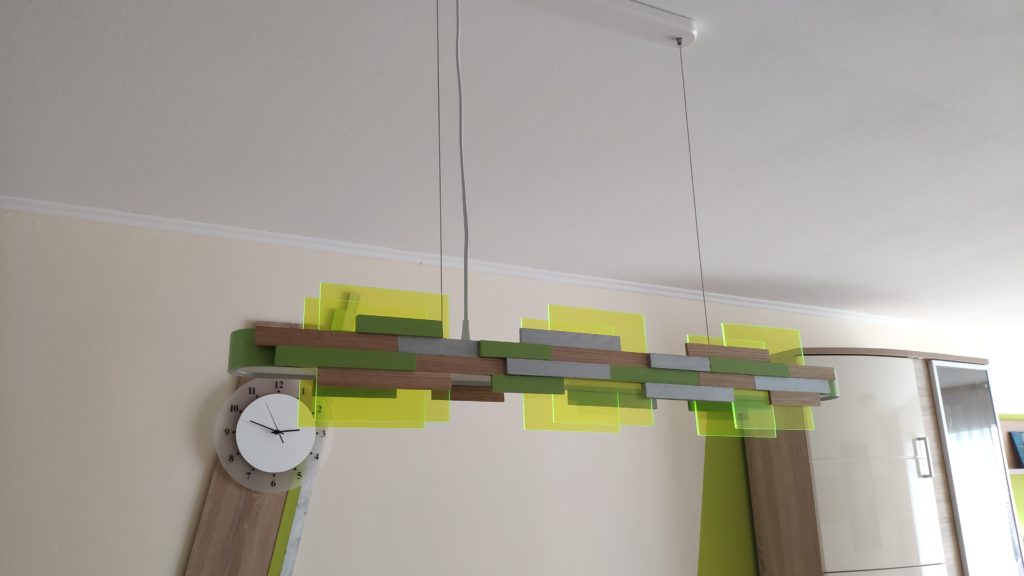
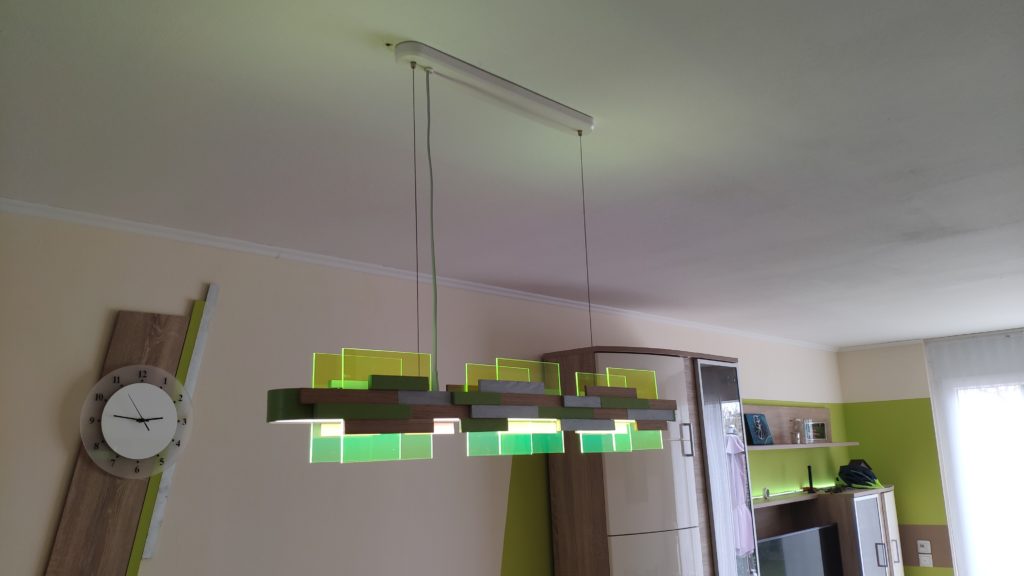
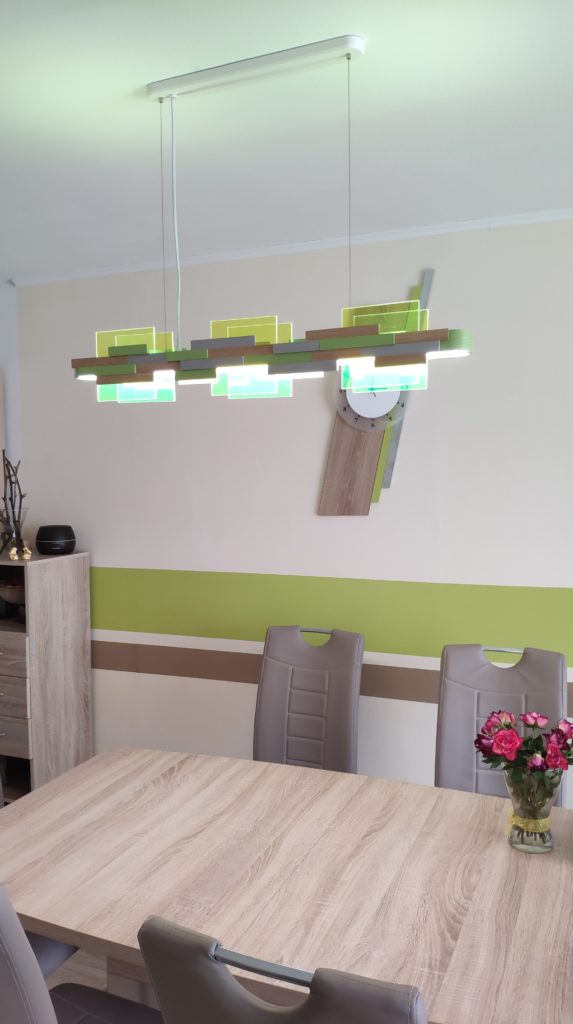
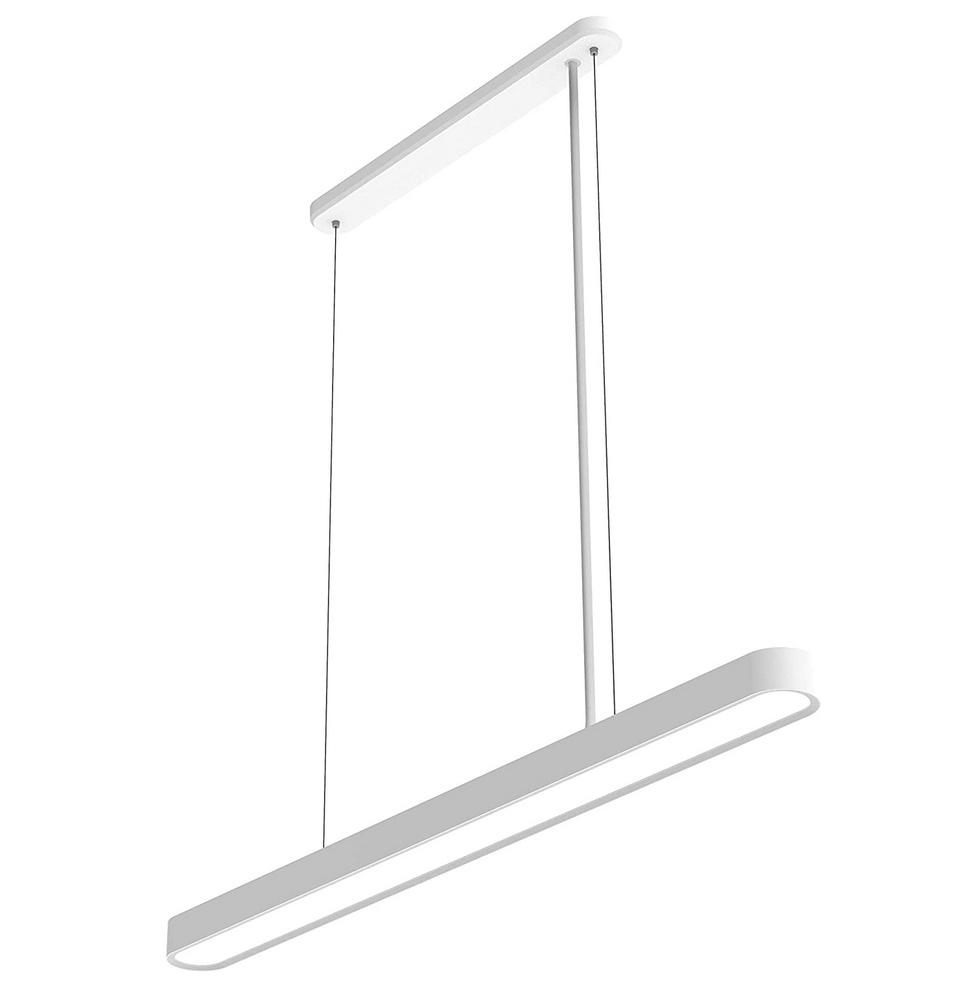
Needed a new lamp for the table and didn’t find anything to go with the design of my new living room. So I decided to start with this smart lamp from Xiaomi and decorate and paint it until it fits.

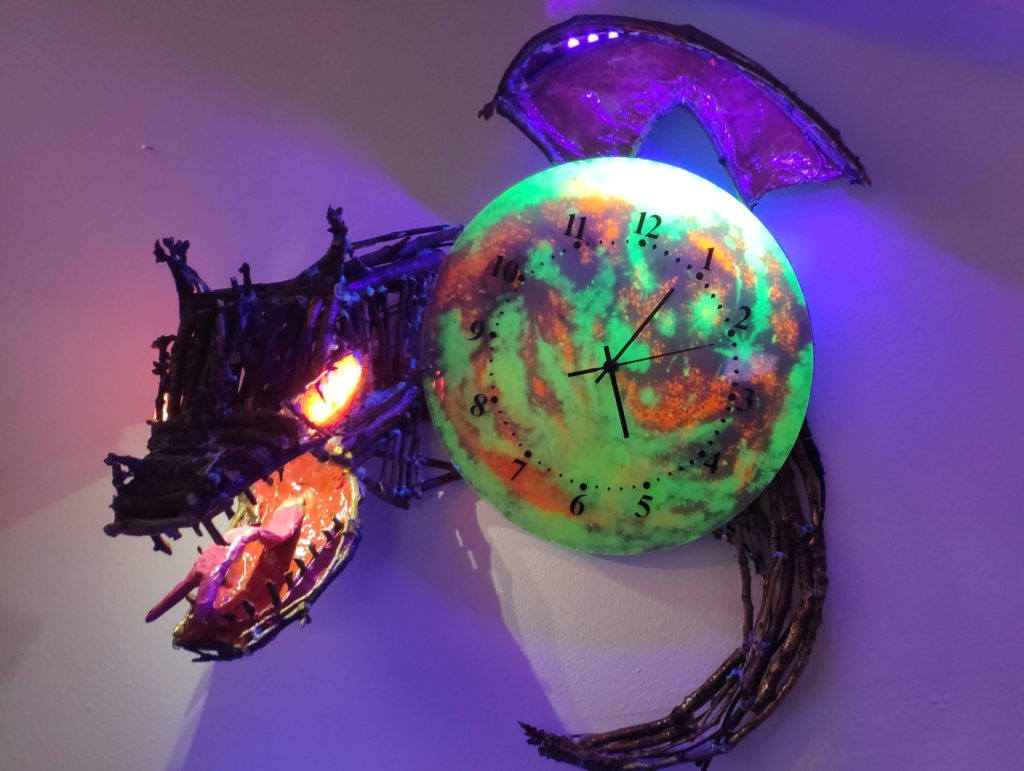
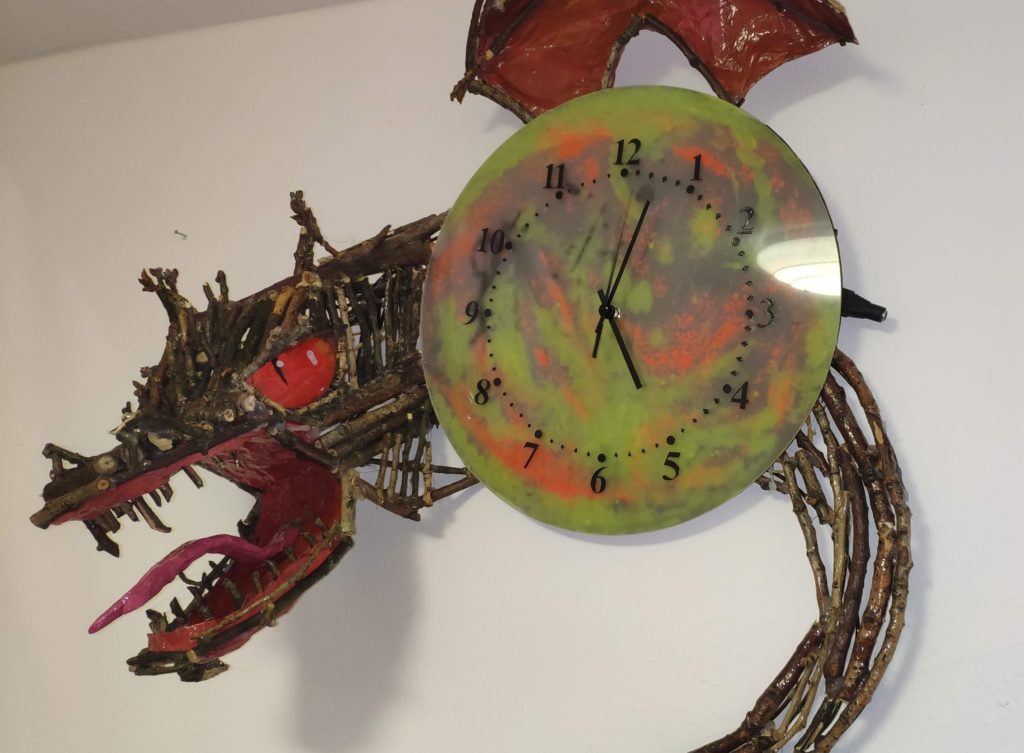
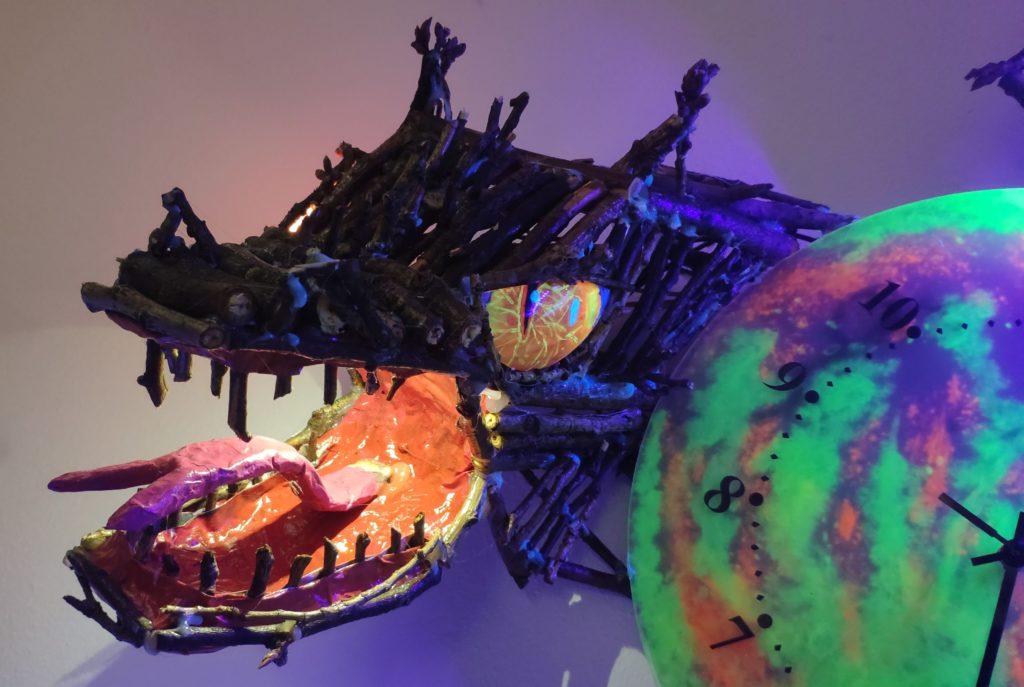
Bone Dragon Moonlight Clock
Posted also on:
https://www.instructables.com/id/Bone-Dragon-Moonlight-Clock/
Entered in contest: https://www.instructables.com/contest/clocks2020/
Some time ago I built a clock for my living room, since I found nothing to buy which had at least tolerable designs 🙂
Of course my son seeing this had a request of his own. So to summarize, he said he wants:
- a radio controlled clock
- with a dragon on it
- on top of a moon
- which has a night light which starts automatically at night
- using black light for some extra style
Supplies:
- a radio controlled clock module (this one)
- round acrylic glass
- wodden base
- wire for the structure
- dry braches
etc. to be specified in the next steps
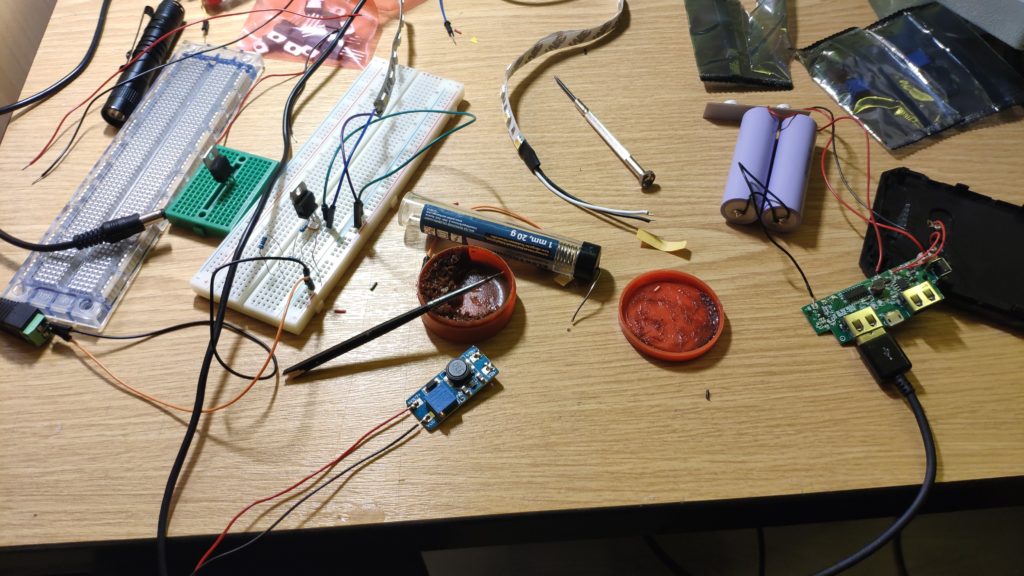
OK, so I started with the electronics. In this part I wanted to do the following:
- night light using some 5050 led strips
- black light using 5050 uv light led strips (396 nm light)
- make it all with solar charged batteries using this ripped up diy kit
- charge by day and go on automatically by night
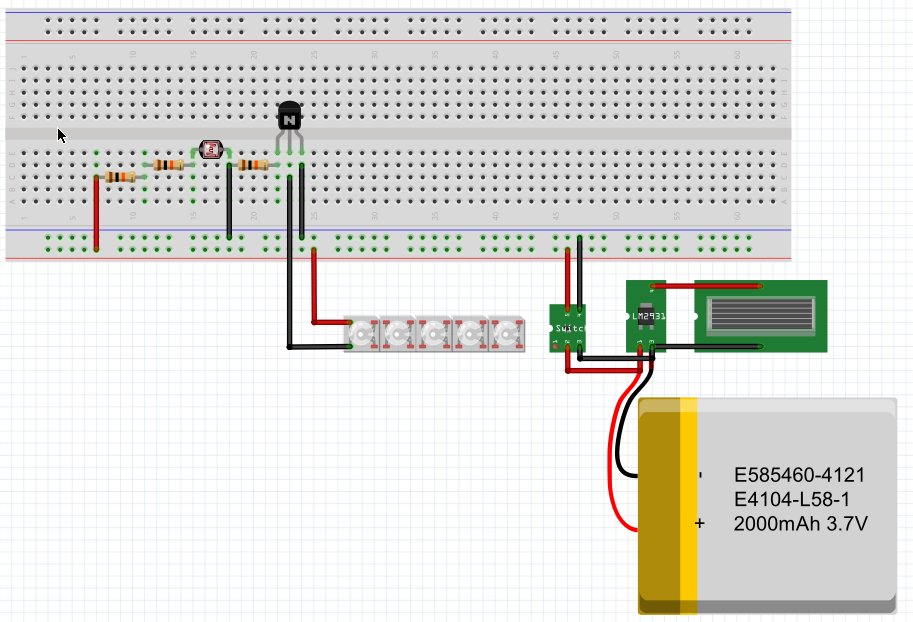
So I started putting all together like shown in the fritzing sketch: 3x 10kO resistors, a simple photoresistor and a TIP120 transistor. All connected with the 12V leds and the 3.7V battery/solar charging module (also used a 3.7V to 12V voltage step-up converter)
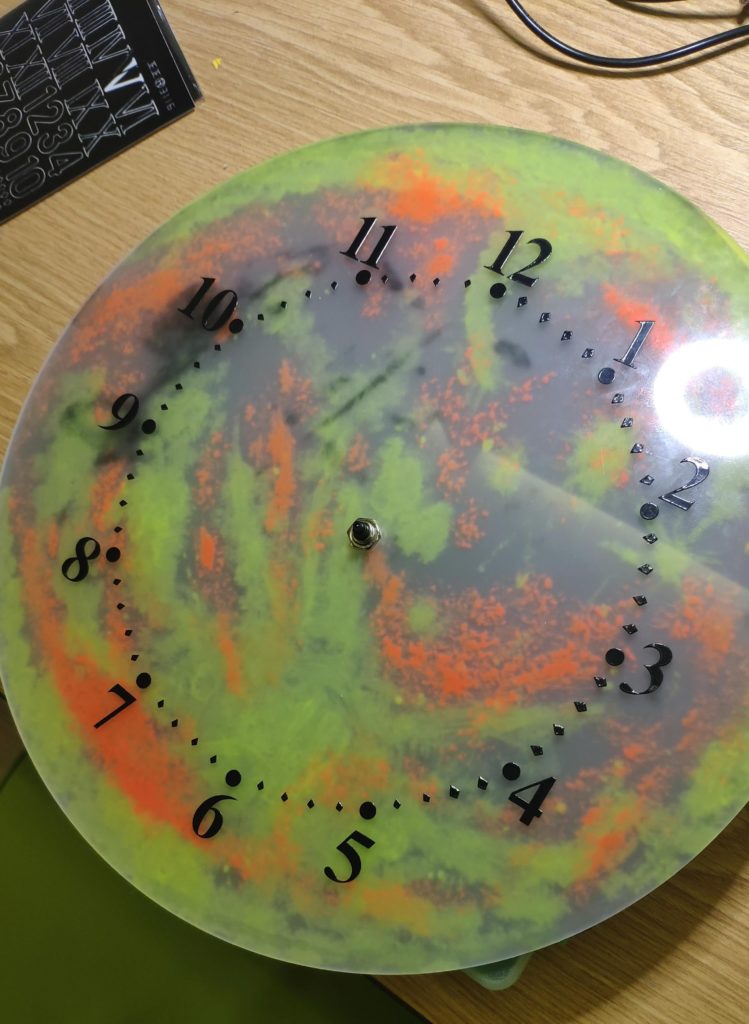
I went on to build the actual clock. I started painting the back side of the acrylic glass with:
Amsterdam Specialities – black light reflective paints
Started with yellow, and went on with some orange/red to give it a moon-like structure paint. While painting it I used a black light flash light to check the effect.
After that I fixed the clock module in the center of the glass.
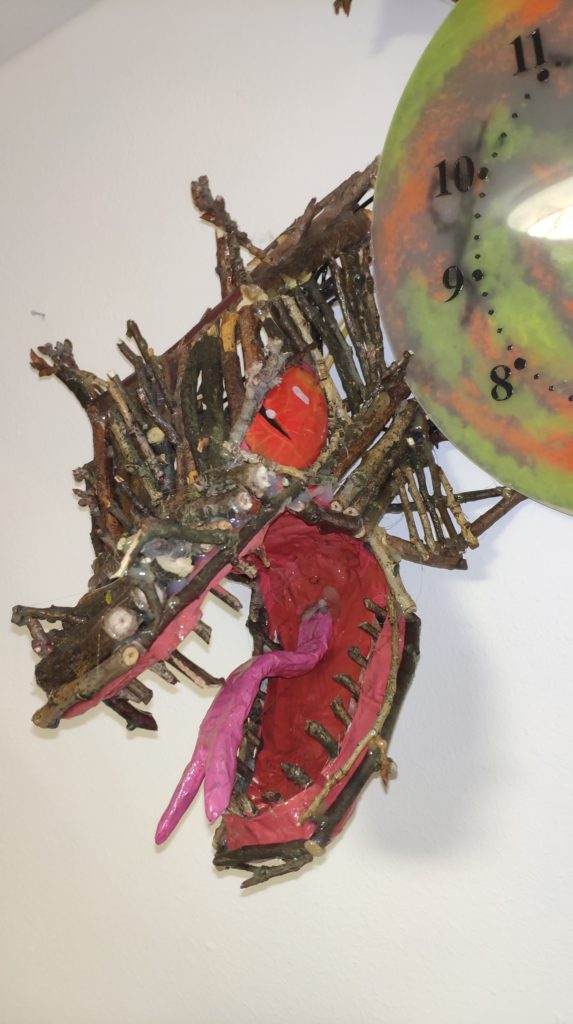
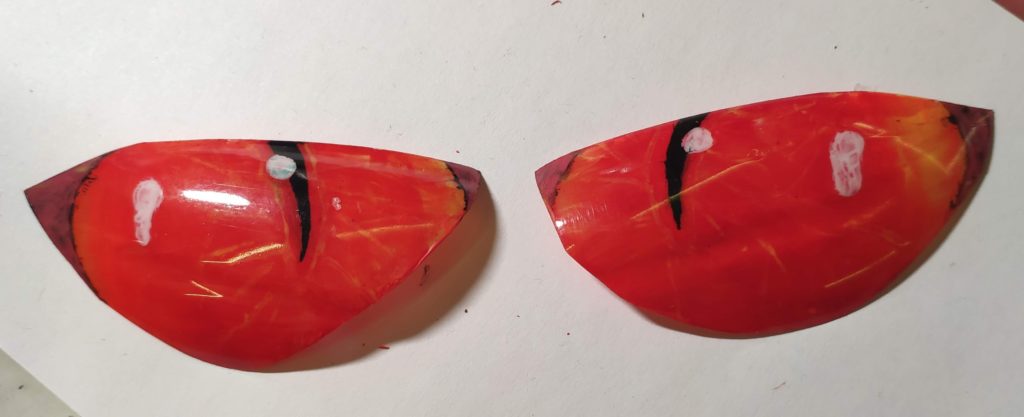
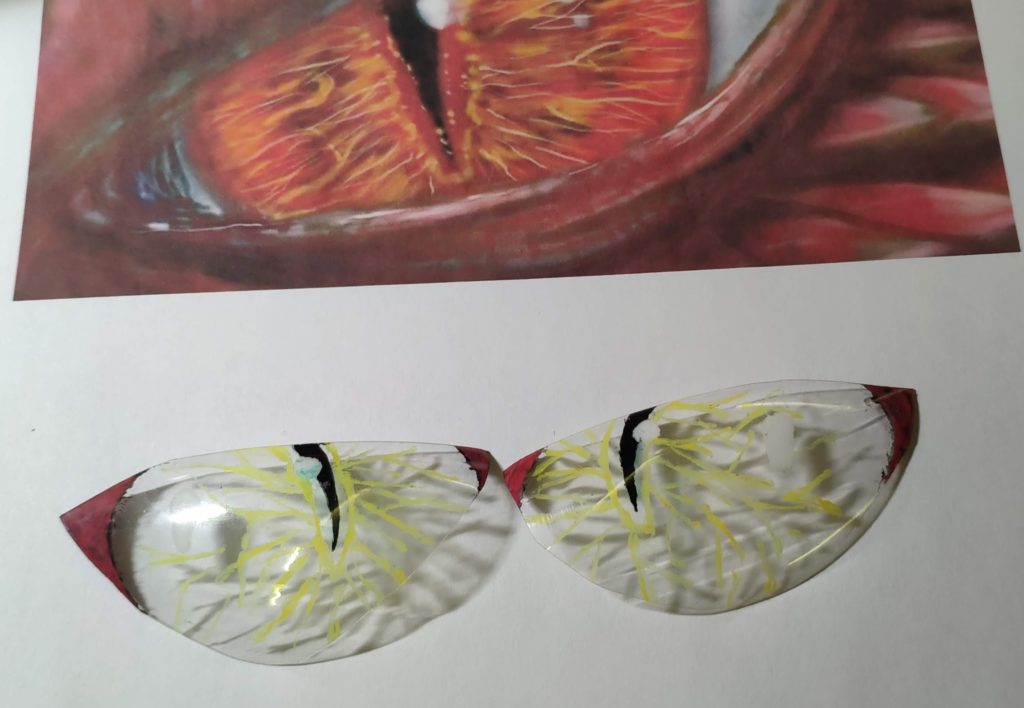
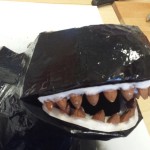
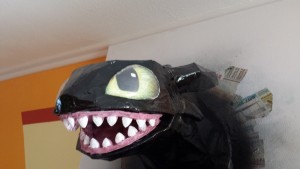
OK, for the eyes you need to take the time since they have to be nice.
First I printed something from the internet, in the style I wanted. Then I cut out the form from the bottom of a plastic bottle. Then I painted them on the inside starting with black, then yellow, then the red base.
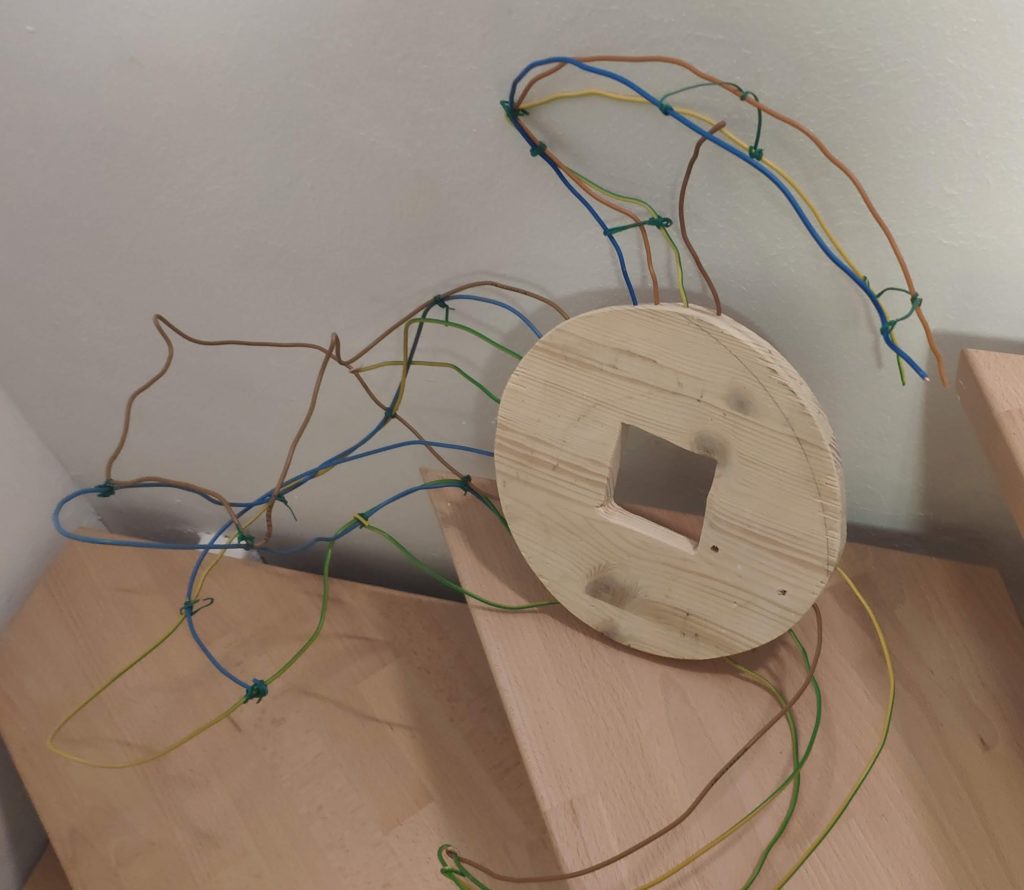
Then I cut out a wooden circle and inside a rectangle to fit the clockwork.
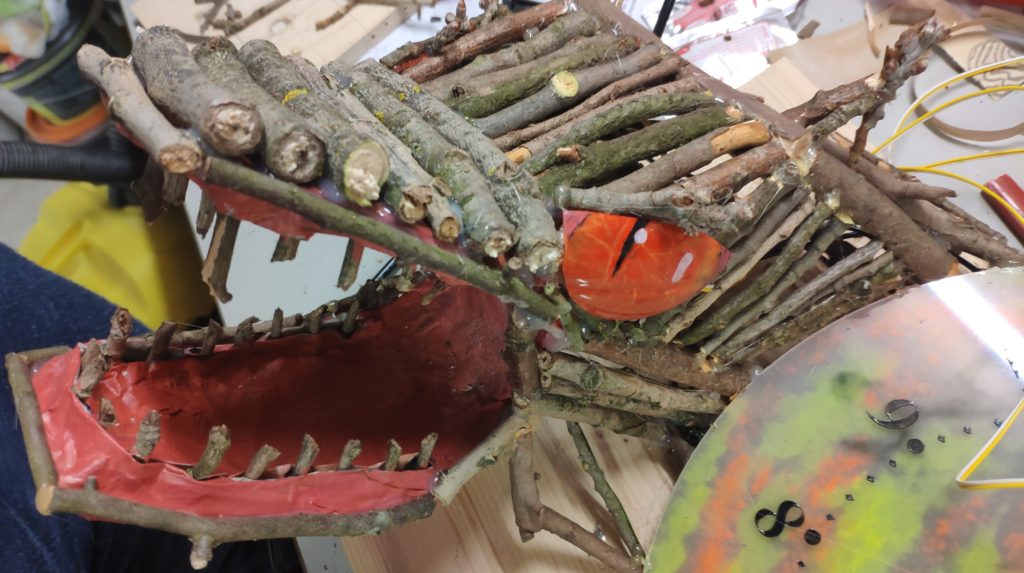
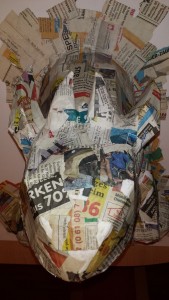
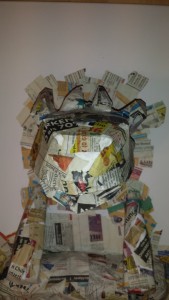
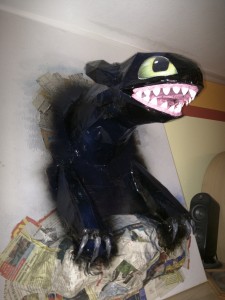
Then using a lot of wire I started to form the base of the dragon, which later on had to hold the branches and twigs. It consists of 3 parts: the head, the wings and the tail.
I had to watch the form having in mind that the mouth should be lit, the eyes need a plain spot, the wings need to cover the black light led strips and hold the solar charging module.
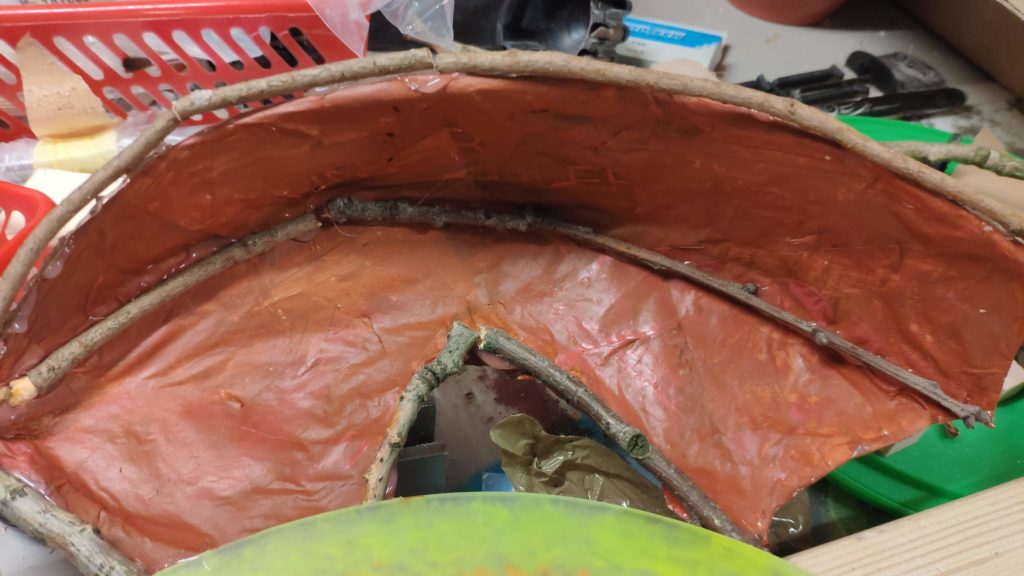
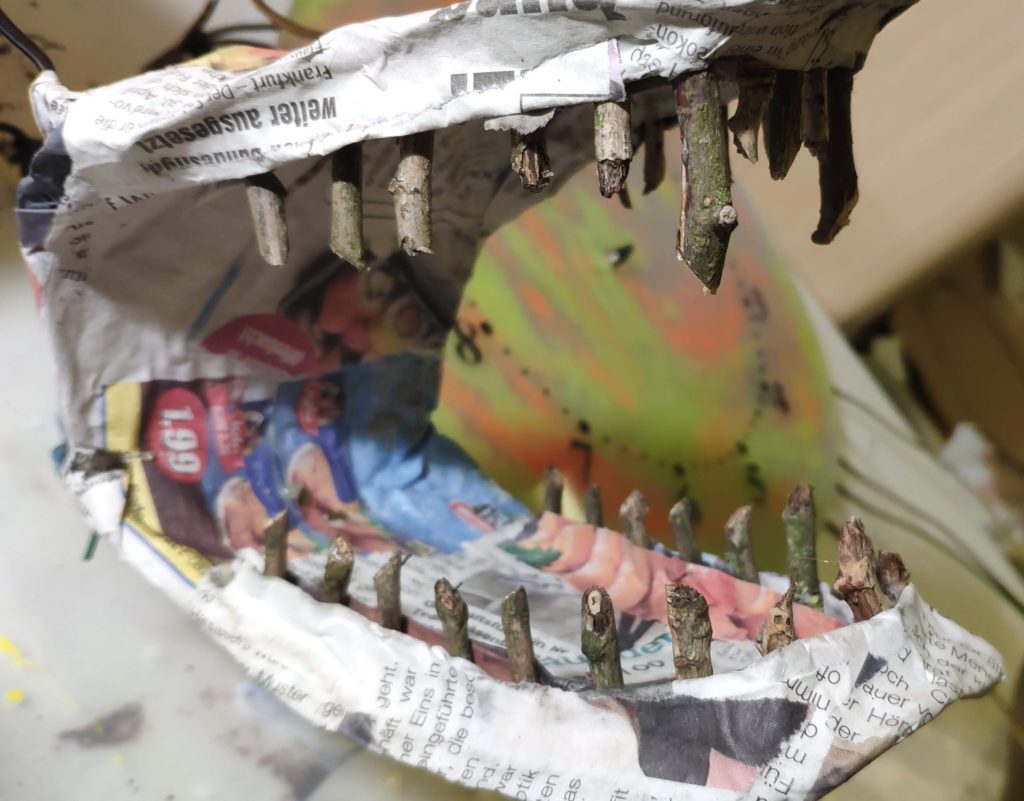
Now every part of the dragons I planned to do with twigs, but the inside of the mouth and the wings had to look more real so I used some papermache, which will be painted red in the next step.
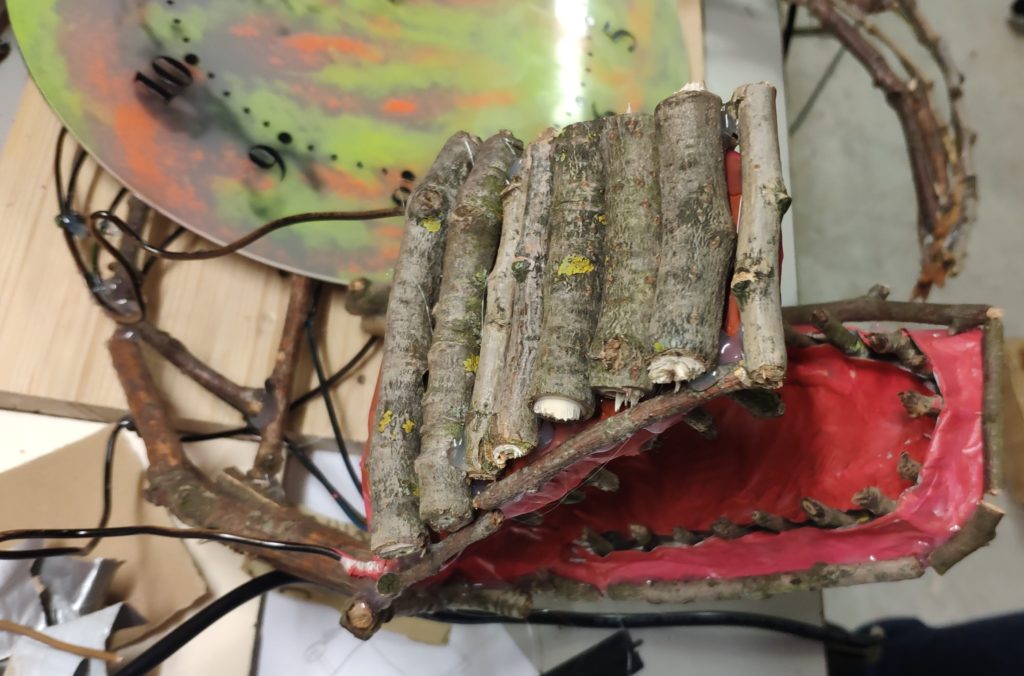
The teeth (also twig parts) I fixed first with hot glue, and covered with papermache.
For this next step I almost melted my hot glue gun 🙂
I started covering all the base of the dragon with cut twigs, following its form and body parts. It took some time but it is really fun to see how he grows 🙂
Also used some twigs on the wings to give everywhere the impression this dragon consists only of bones … hence “Bone Dragon”
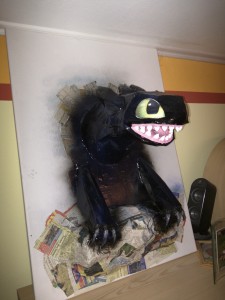
For some finishing touch we made it all shiny with a clear coat spray. I sprayed some more on the inside of the mouth.
At the end I put on the electronics and glued all parts in place:
- the photoresistor is on its tail
- the solar panel on the wings
- the black light led strip is under the wings
- 3 small light strips (3 leds each) are under the eyes and in the mouth
So when lit, the paints on the moon start to reflect the light looking like glowing.
Hope you had fun, we sure did 🙂

UV paint on top
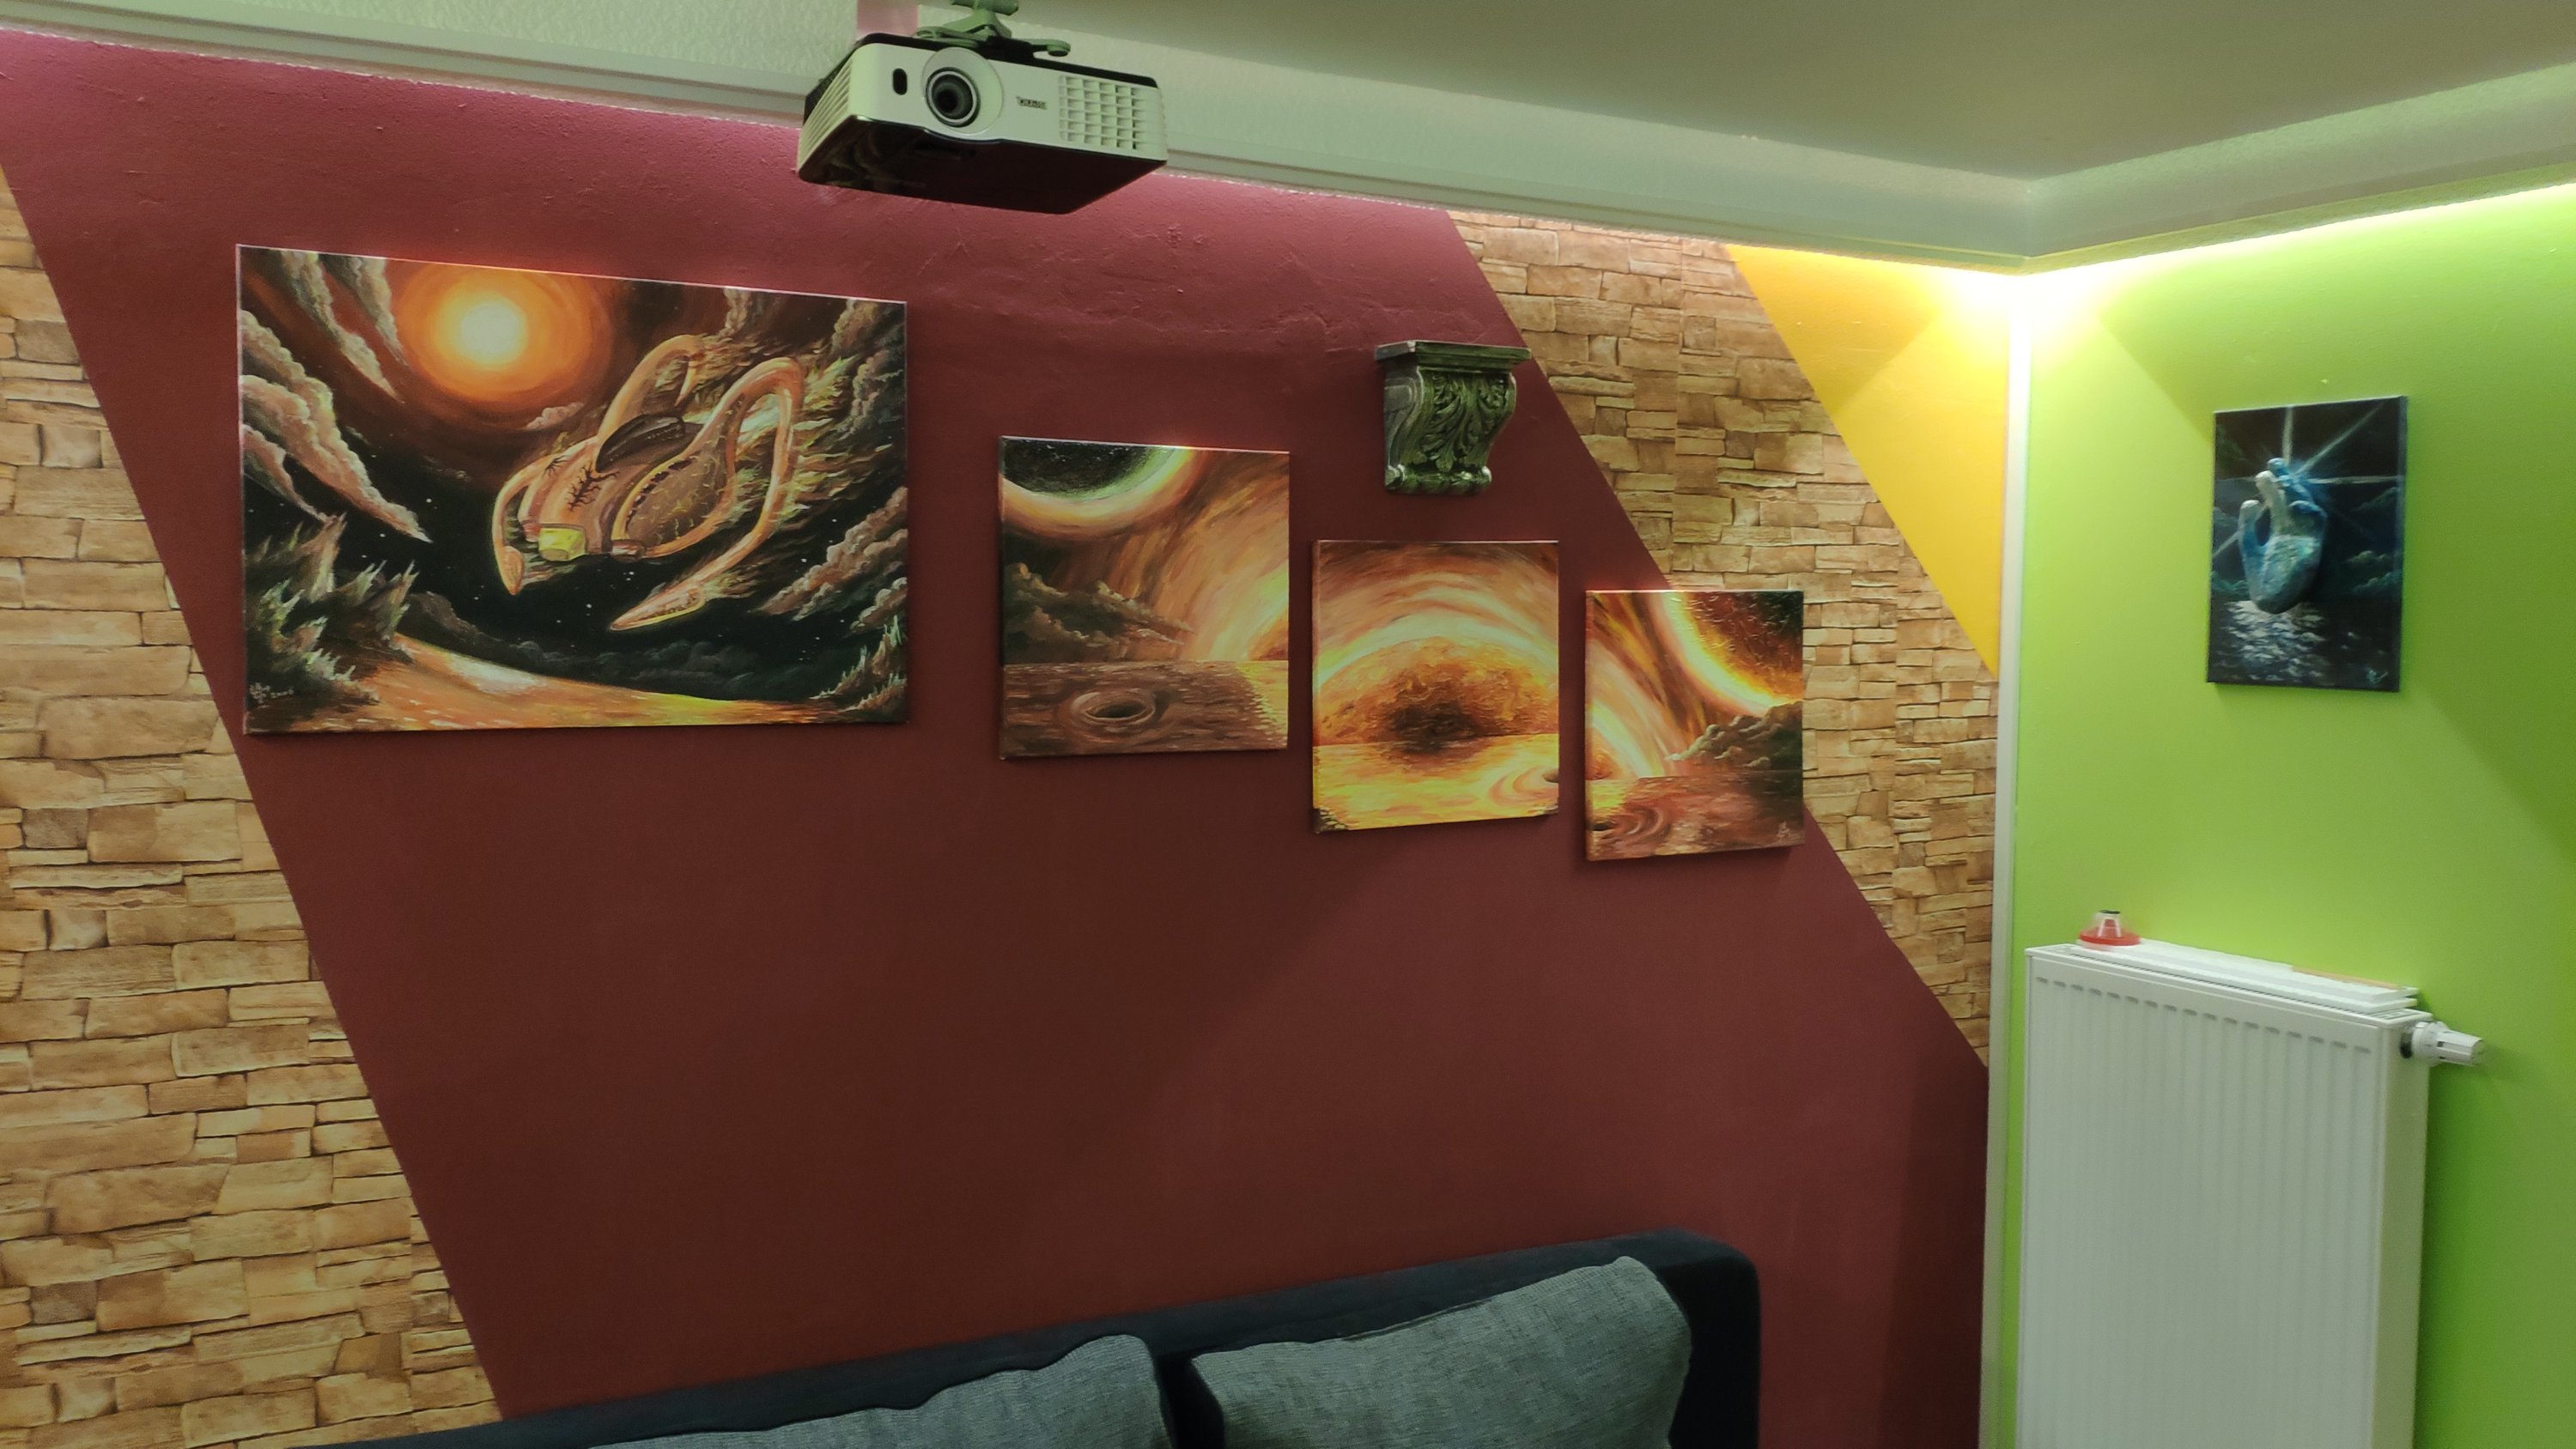
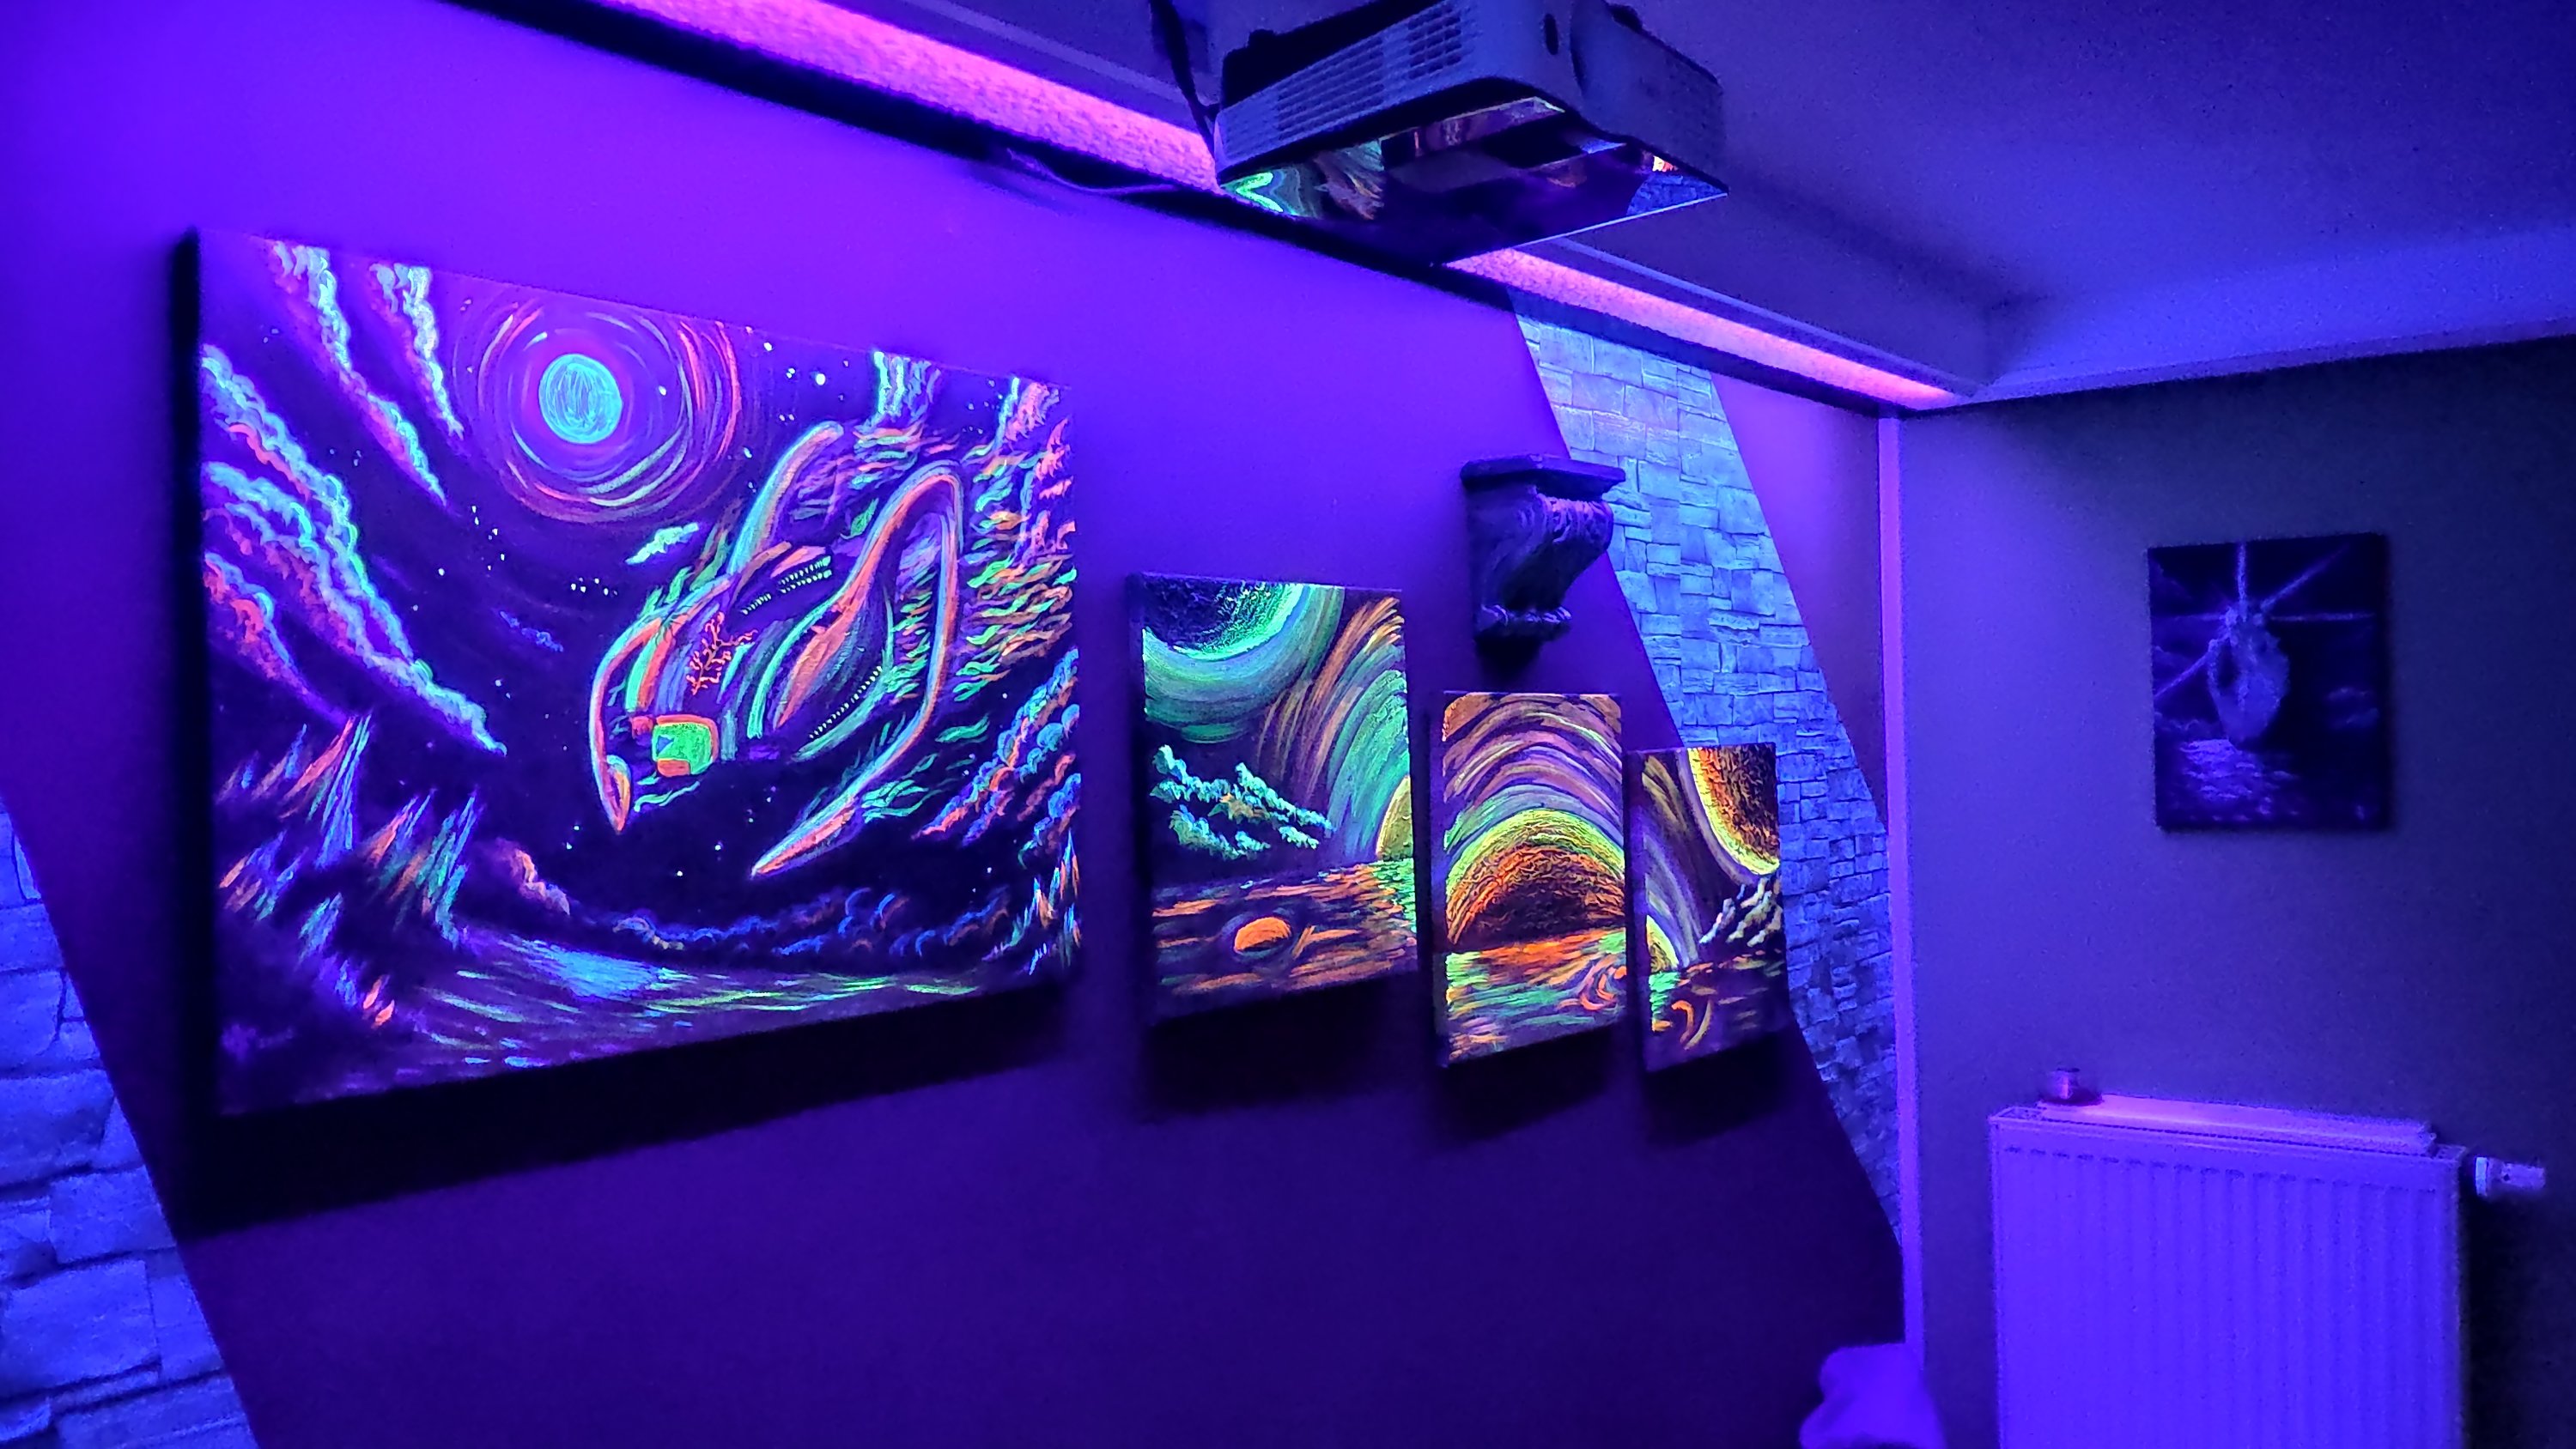
Had some very old paintings of mine hanging around. And since my new hobby room was quite empty, I thought about decorating it with some uv light. Just added a layer of uv paint on the paintings, almost not visible using daylight. But when using the night mode, we get a nice and cozy ambient light.

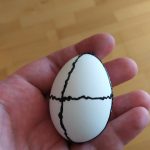
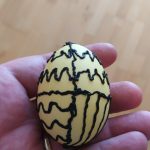
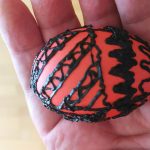
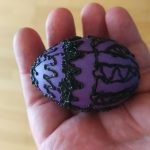
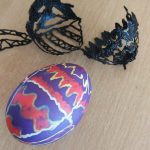
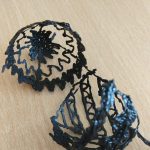
Easter eggs – traditional style
Since Orthodox Eastern are near, we painted some eggs. An old traditional way is to use wax and multiple painting to achieve different decorations. More about how they have to look you could google using “oua incondeiate”.
Anyway I wanted to try this as well. I was totally unprepared and didn’t have cold paints, and the needed wax, so I improvised. I used a 3d pen and normal hot paints.


Halloween masks
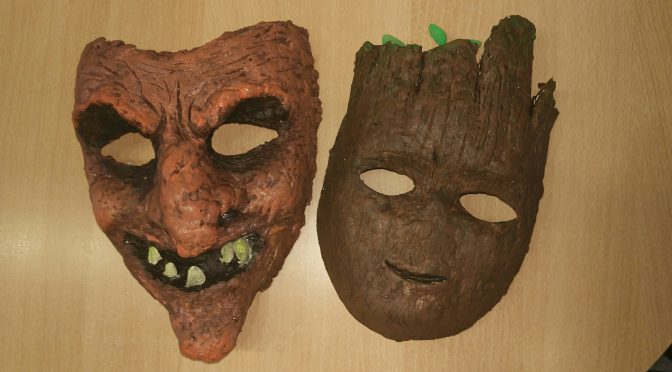
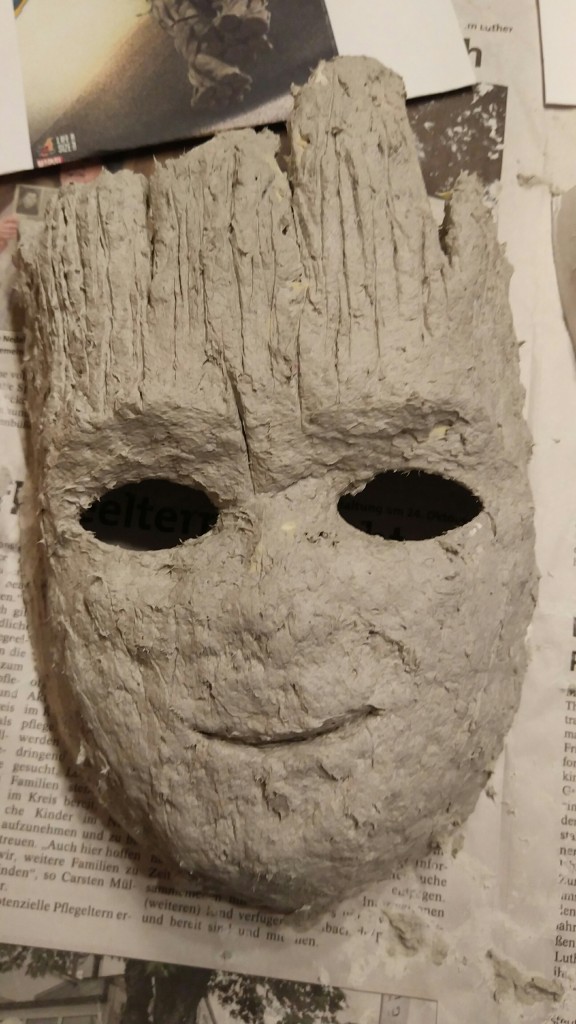
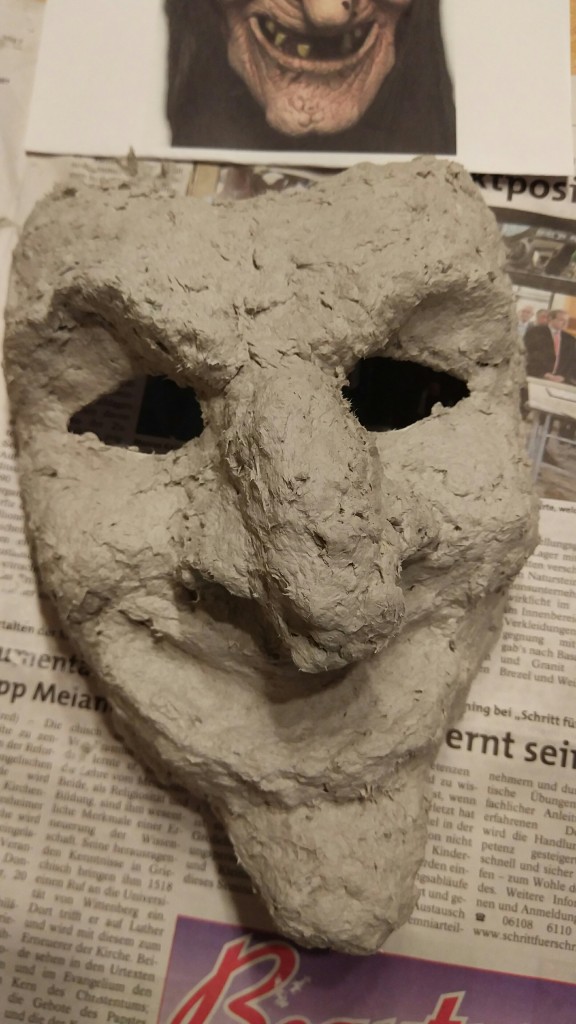
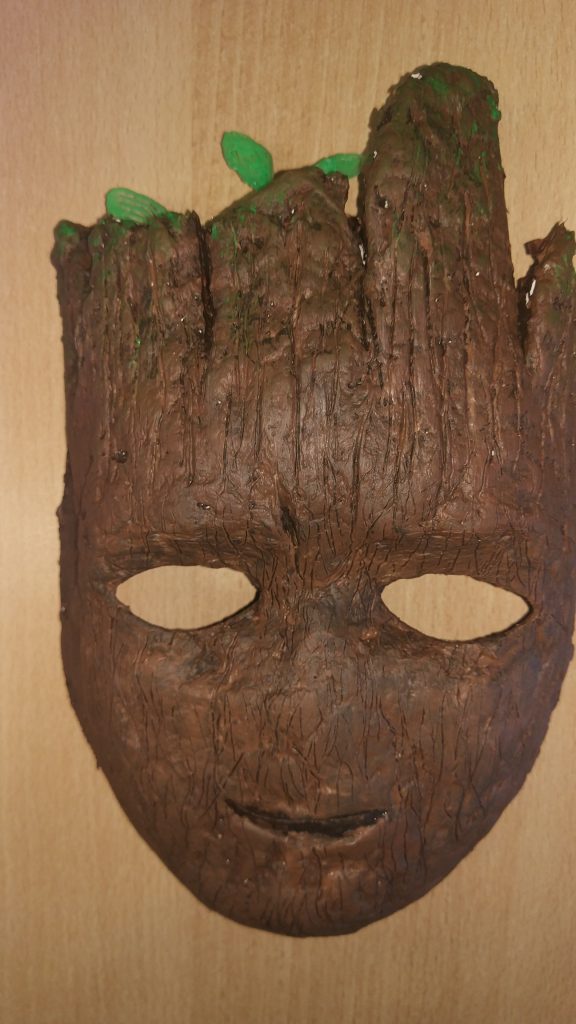
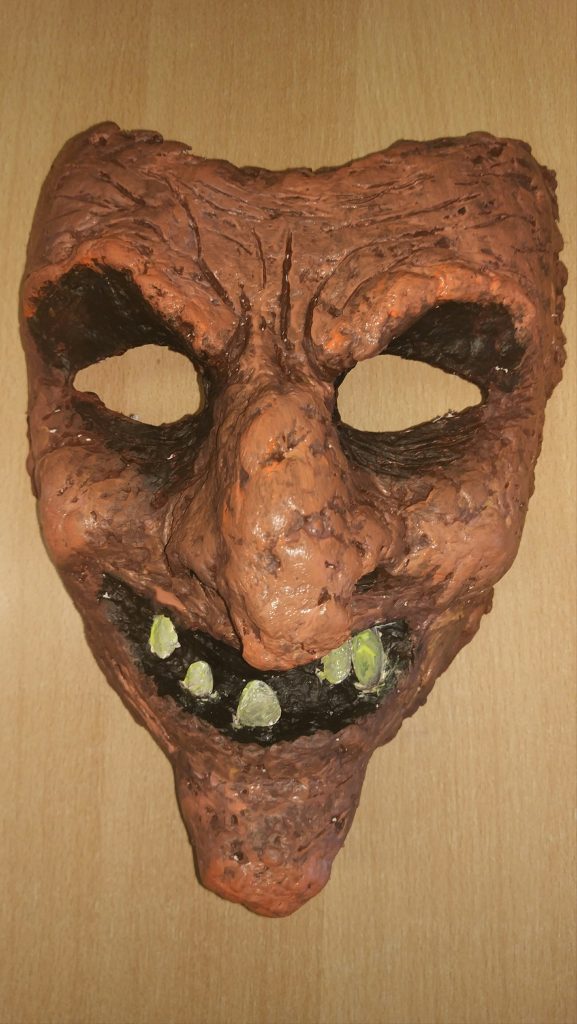
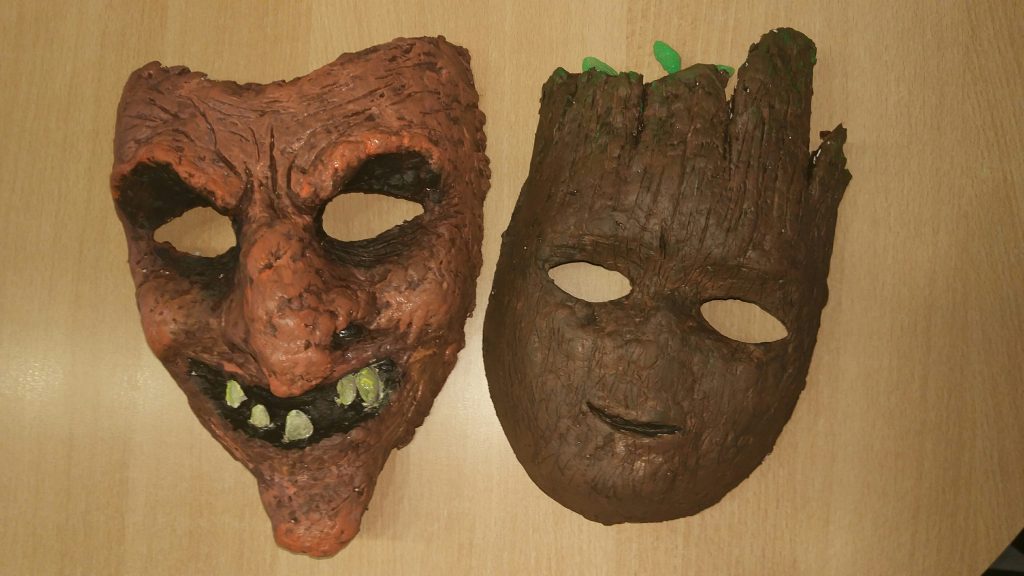
I gotta take time more often for stuff like this. Anyway we decided this year we (me and my children) make our own halloween masks. My daughter decided to go for a witch and my son for baby Groot.
We started of with some basic masks I baught, and using tape and newspapers we shaped the rough form.
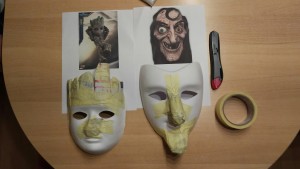
For everything to go faster I also bought some Papermache which mixed with water resulted in a perfect molding stuff. When it gets dry it isn’t too heavy and it can be sanded with sandpaper.
So this is only the first rough form. Still a lot to be done here after it dries out…
Next step was to give them a base color to cover the surface. Later on light colors will be used to give them the real form.
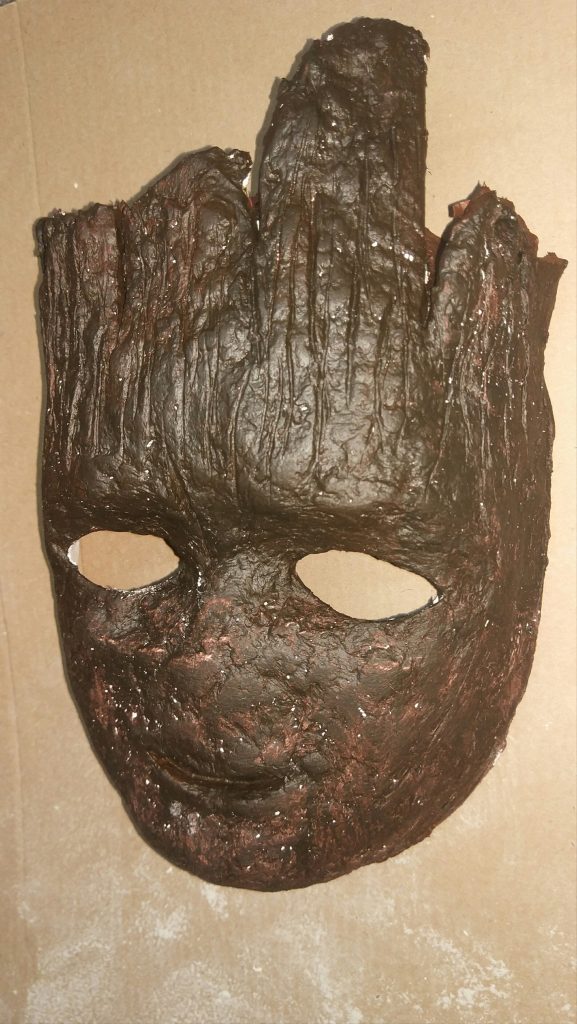
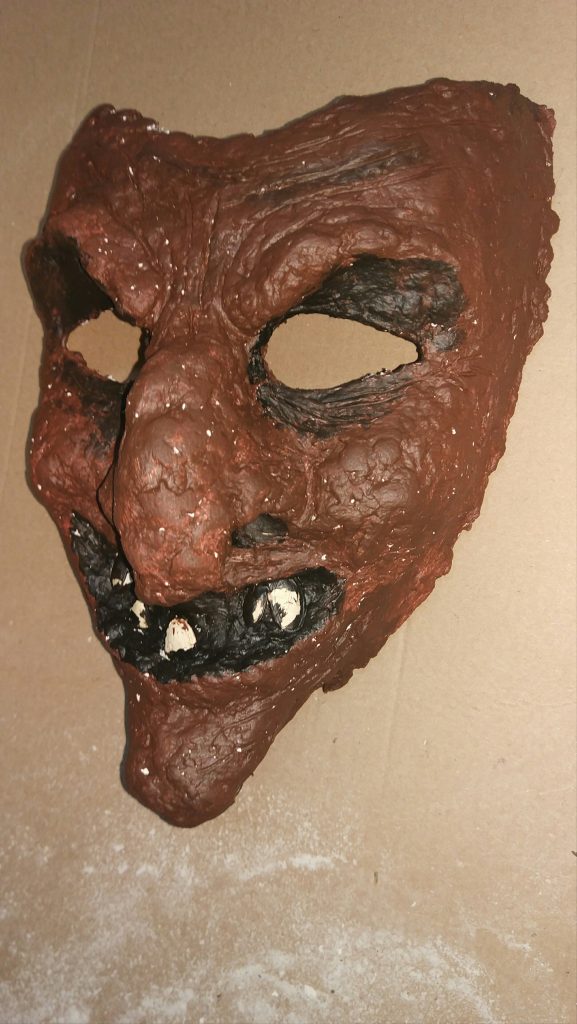
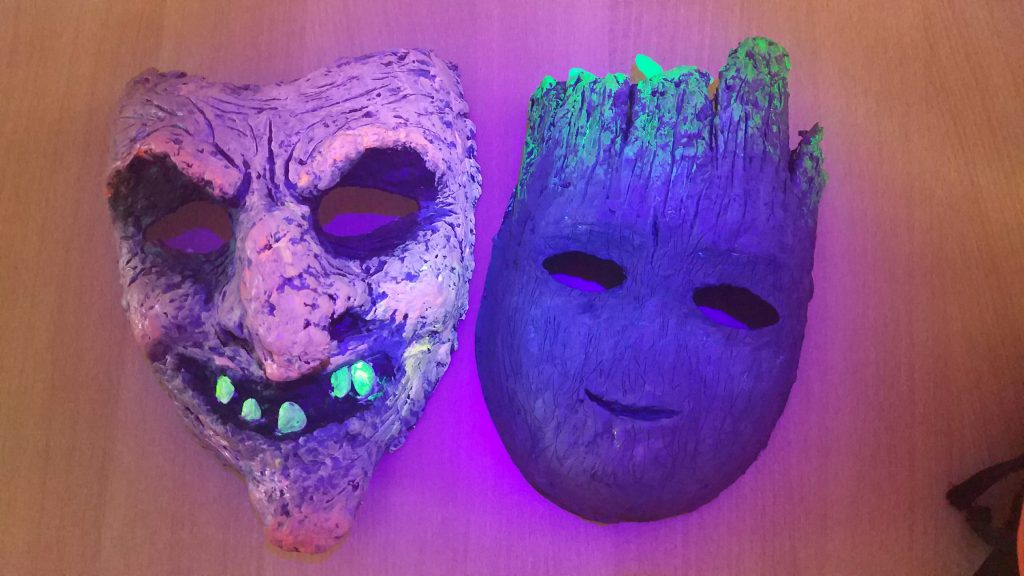
Last touch was painting them in the final colors. Also the leaves for Baby Groot were made with PLA using a 3d pen. We also used UV colors for both so that under UV light tey would shine like the last picture below.
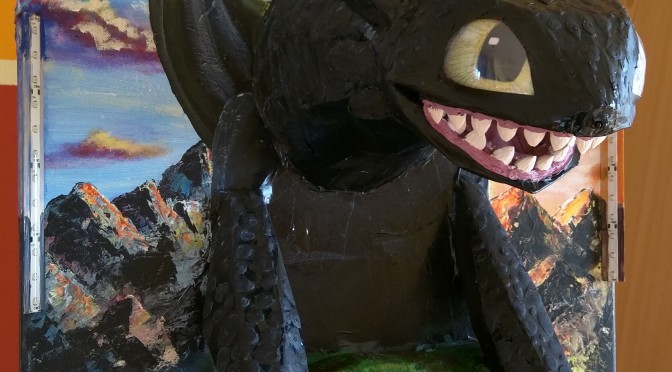
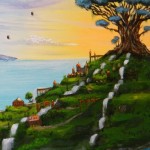
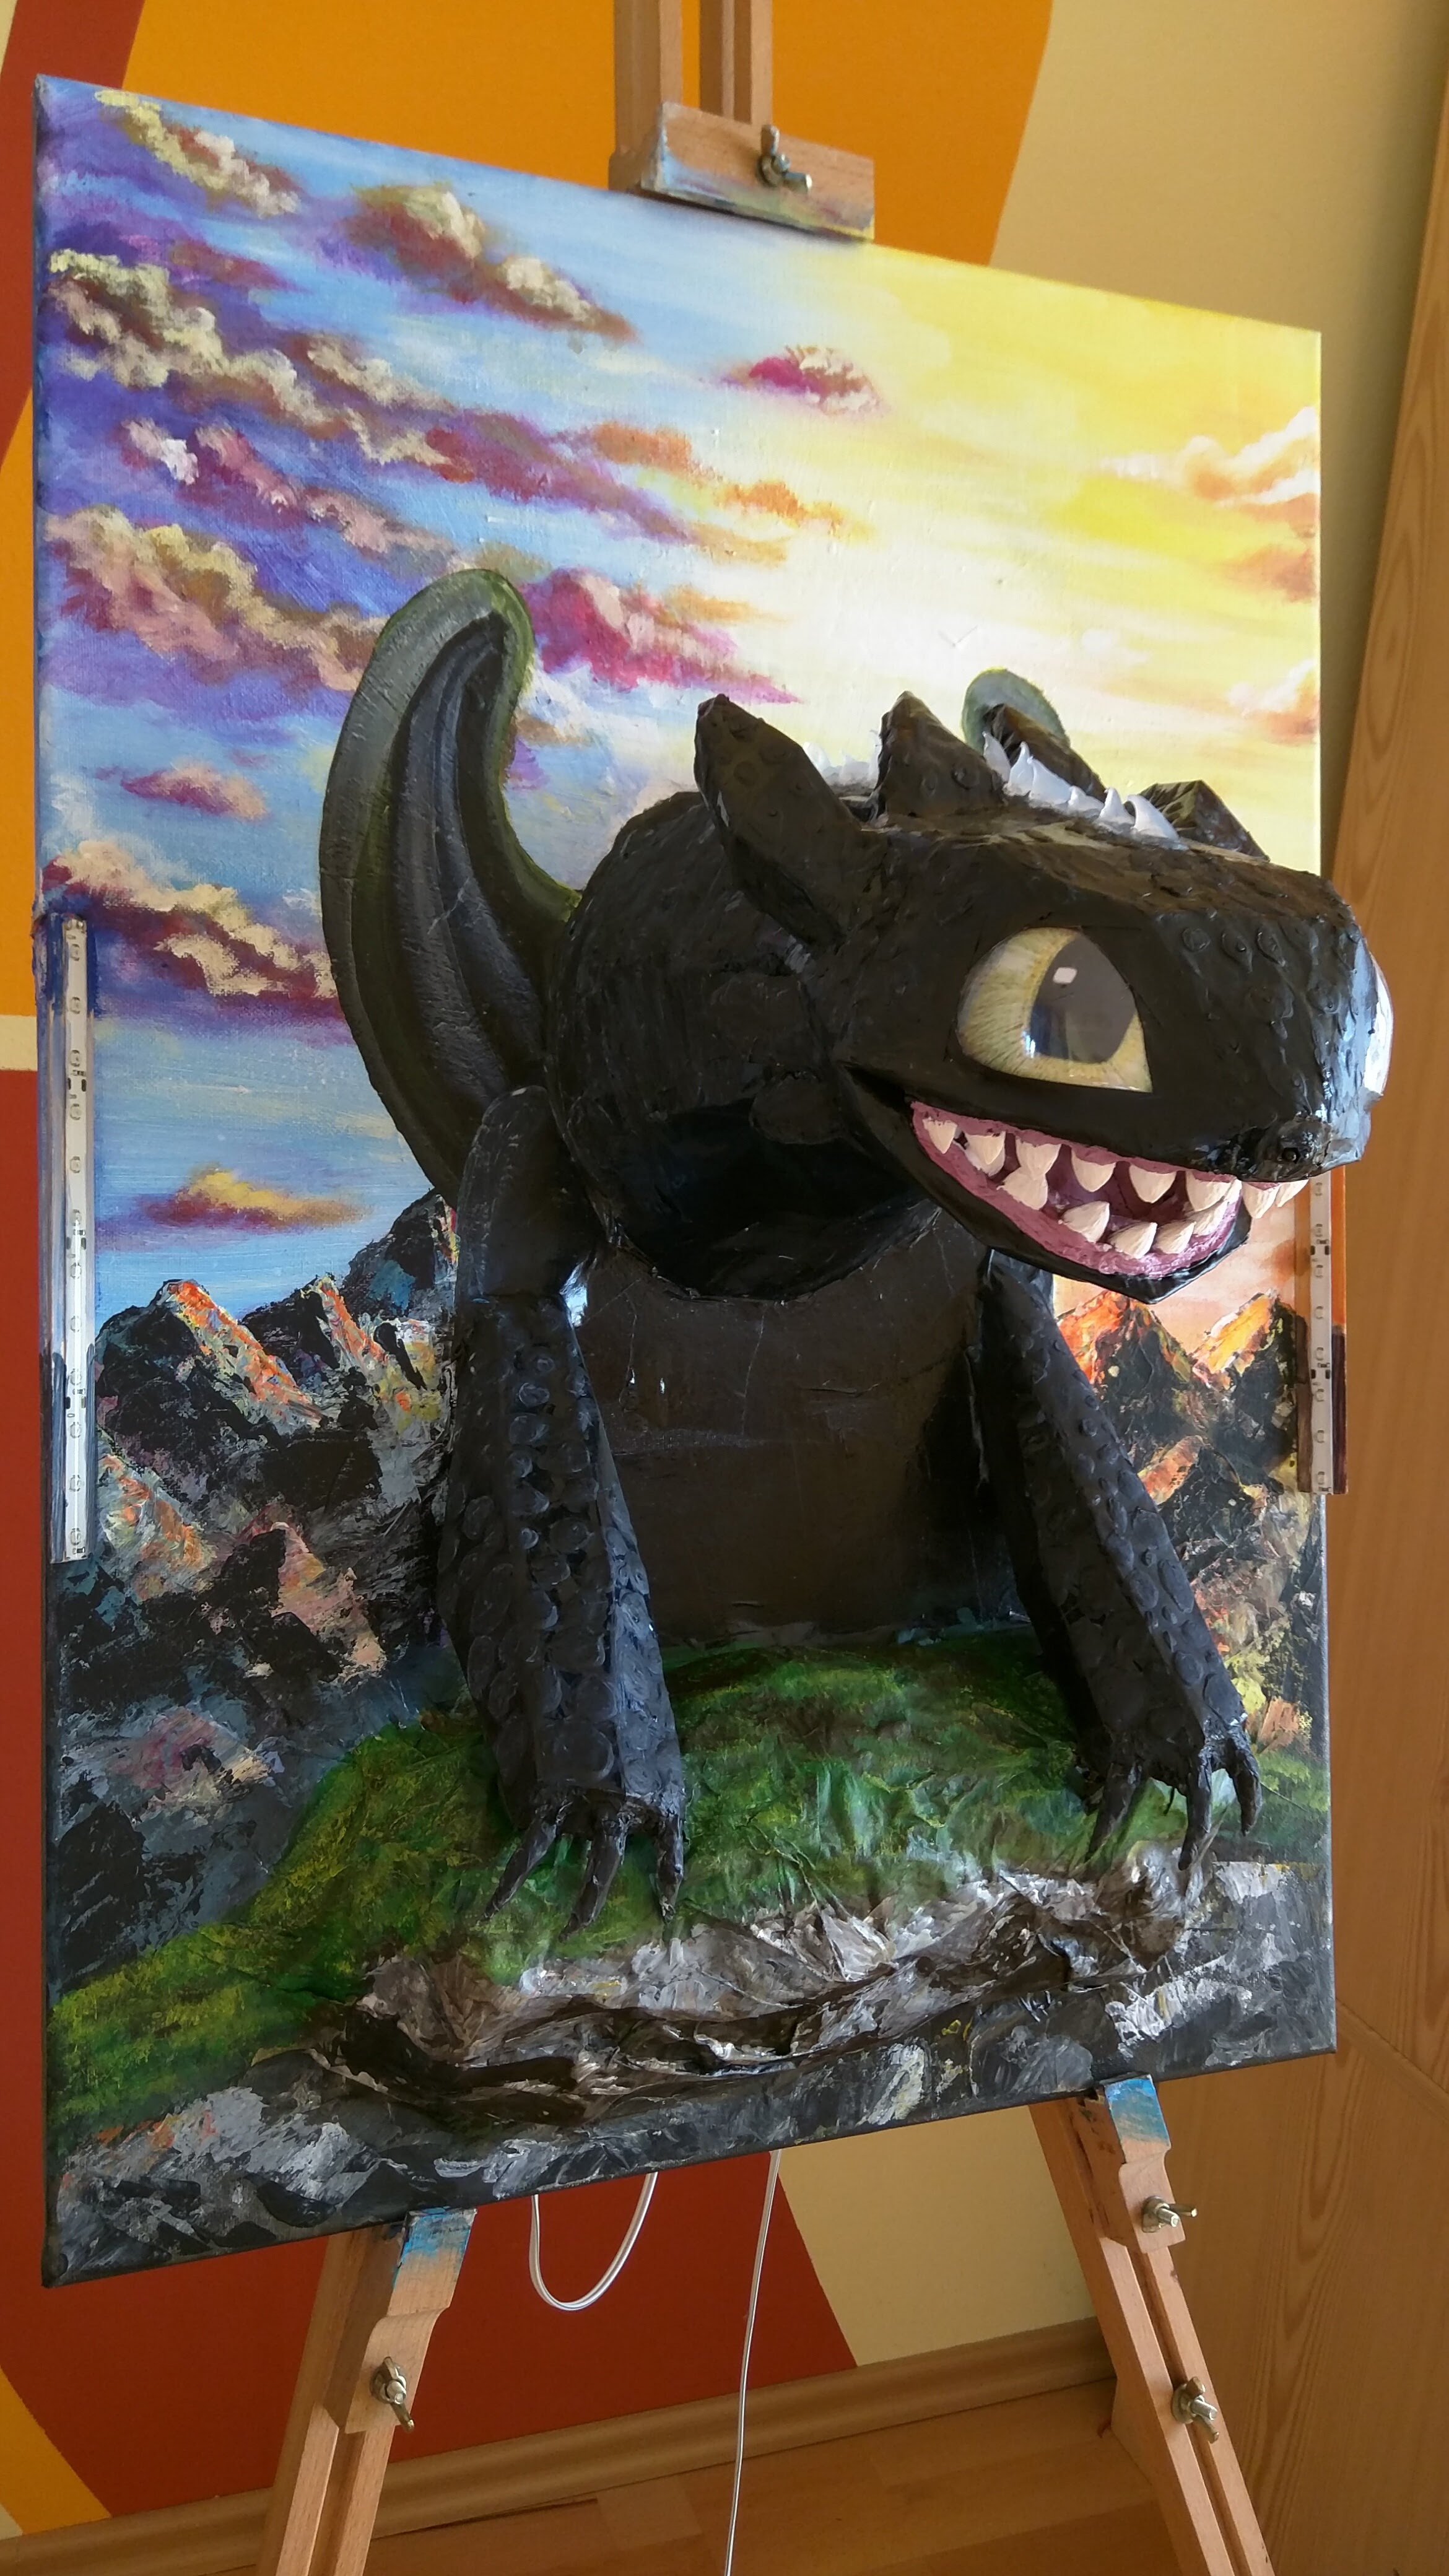
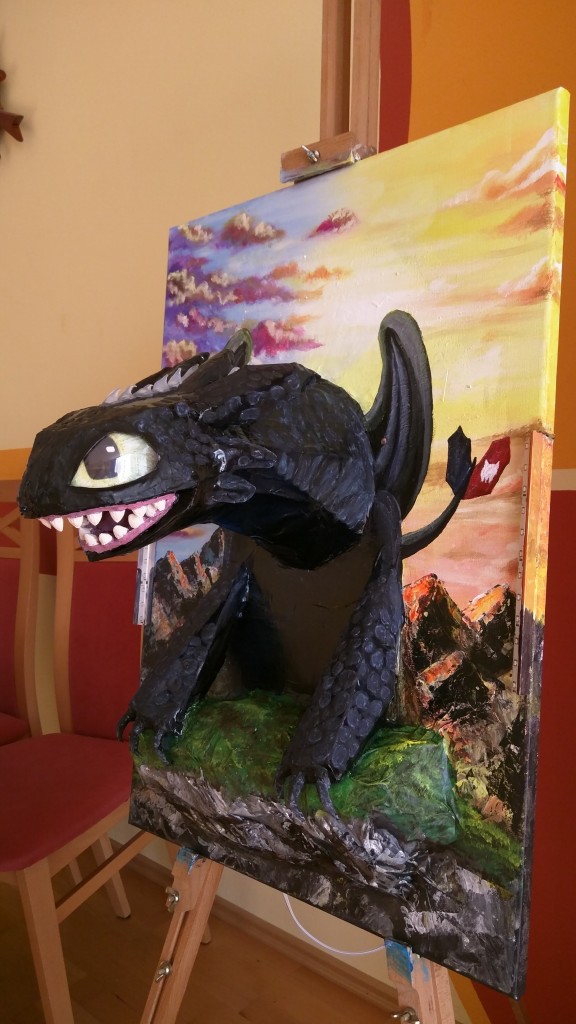
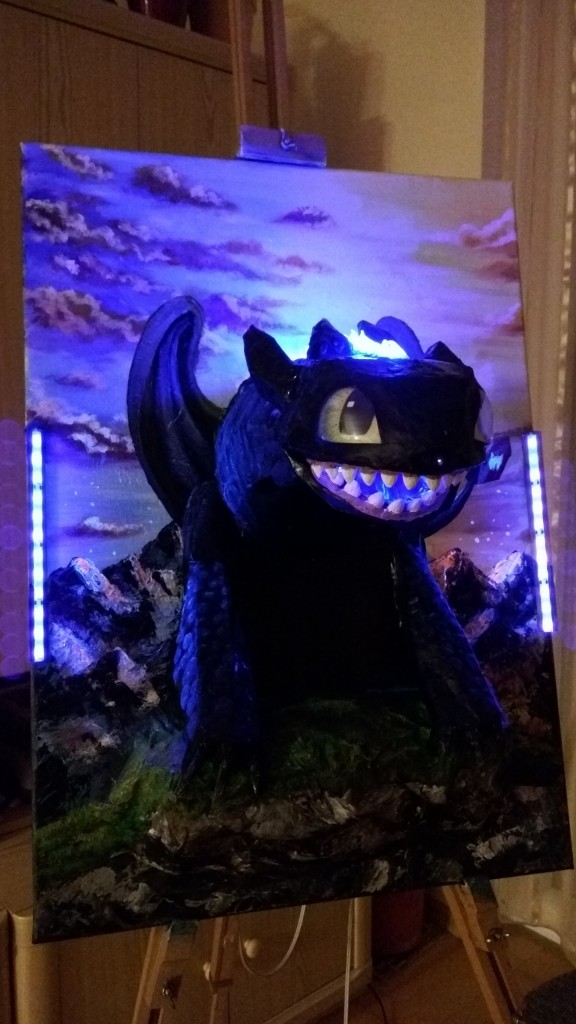
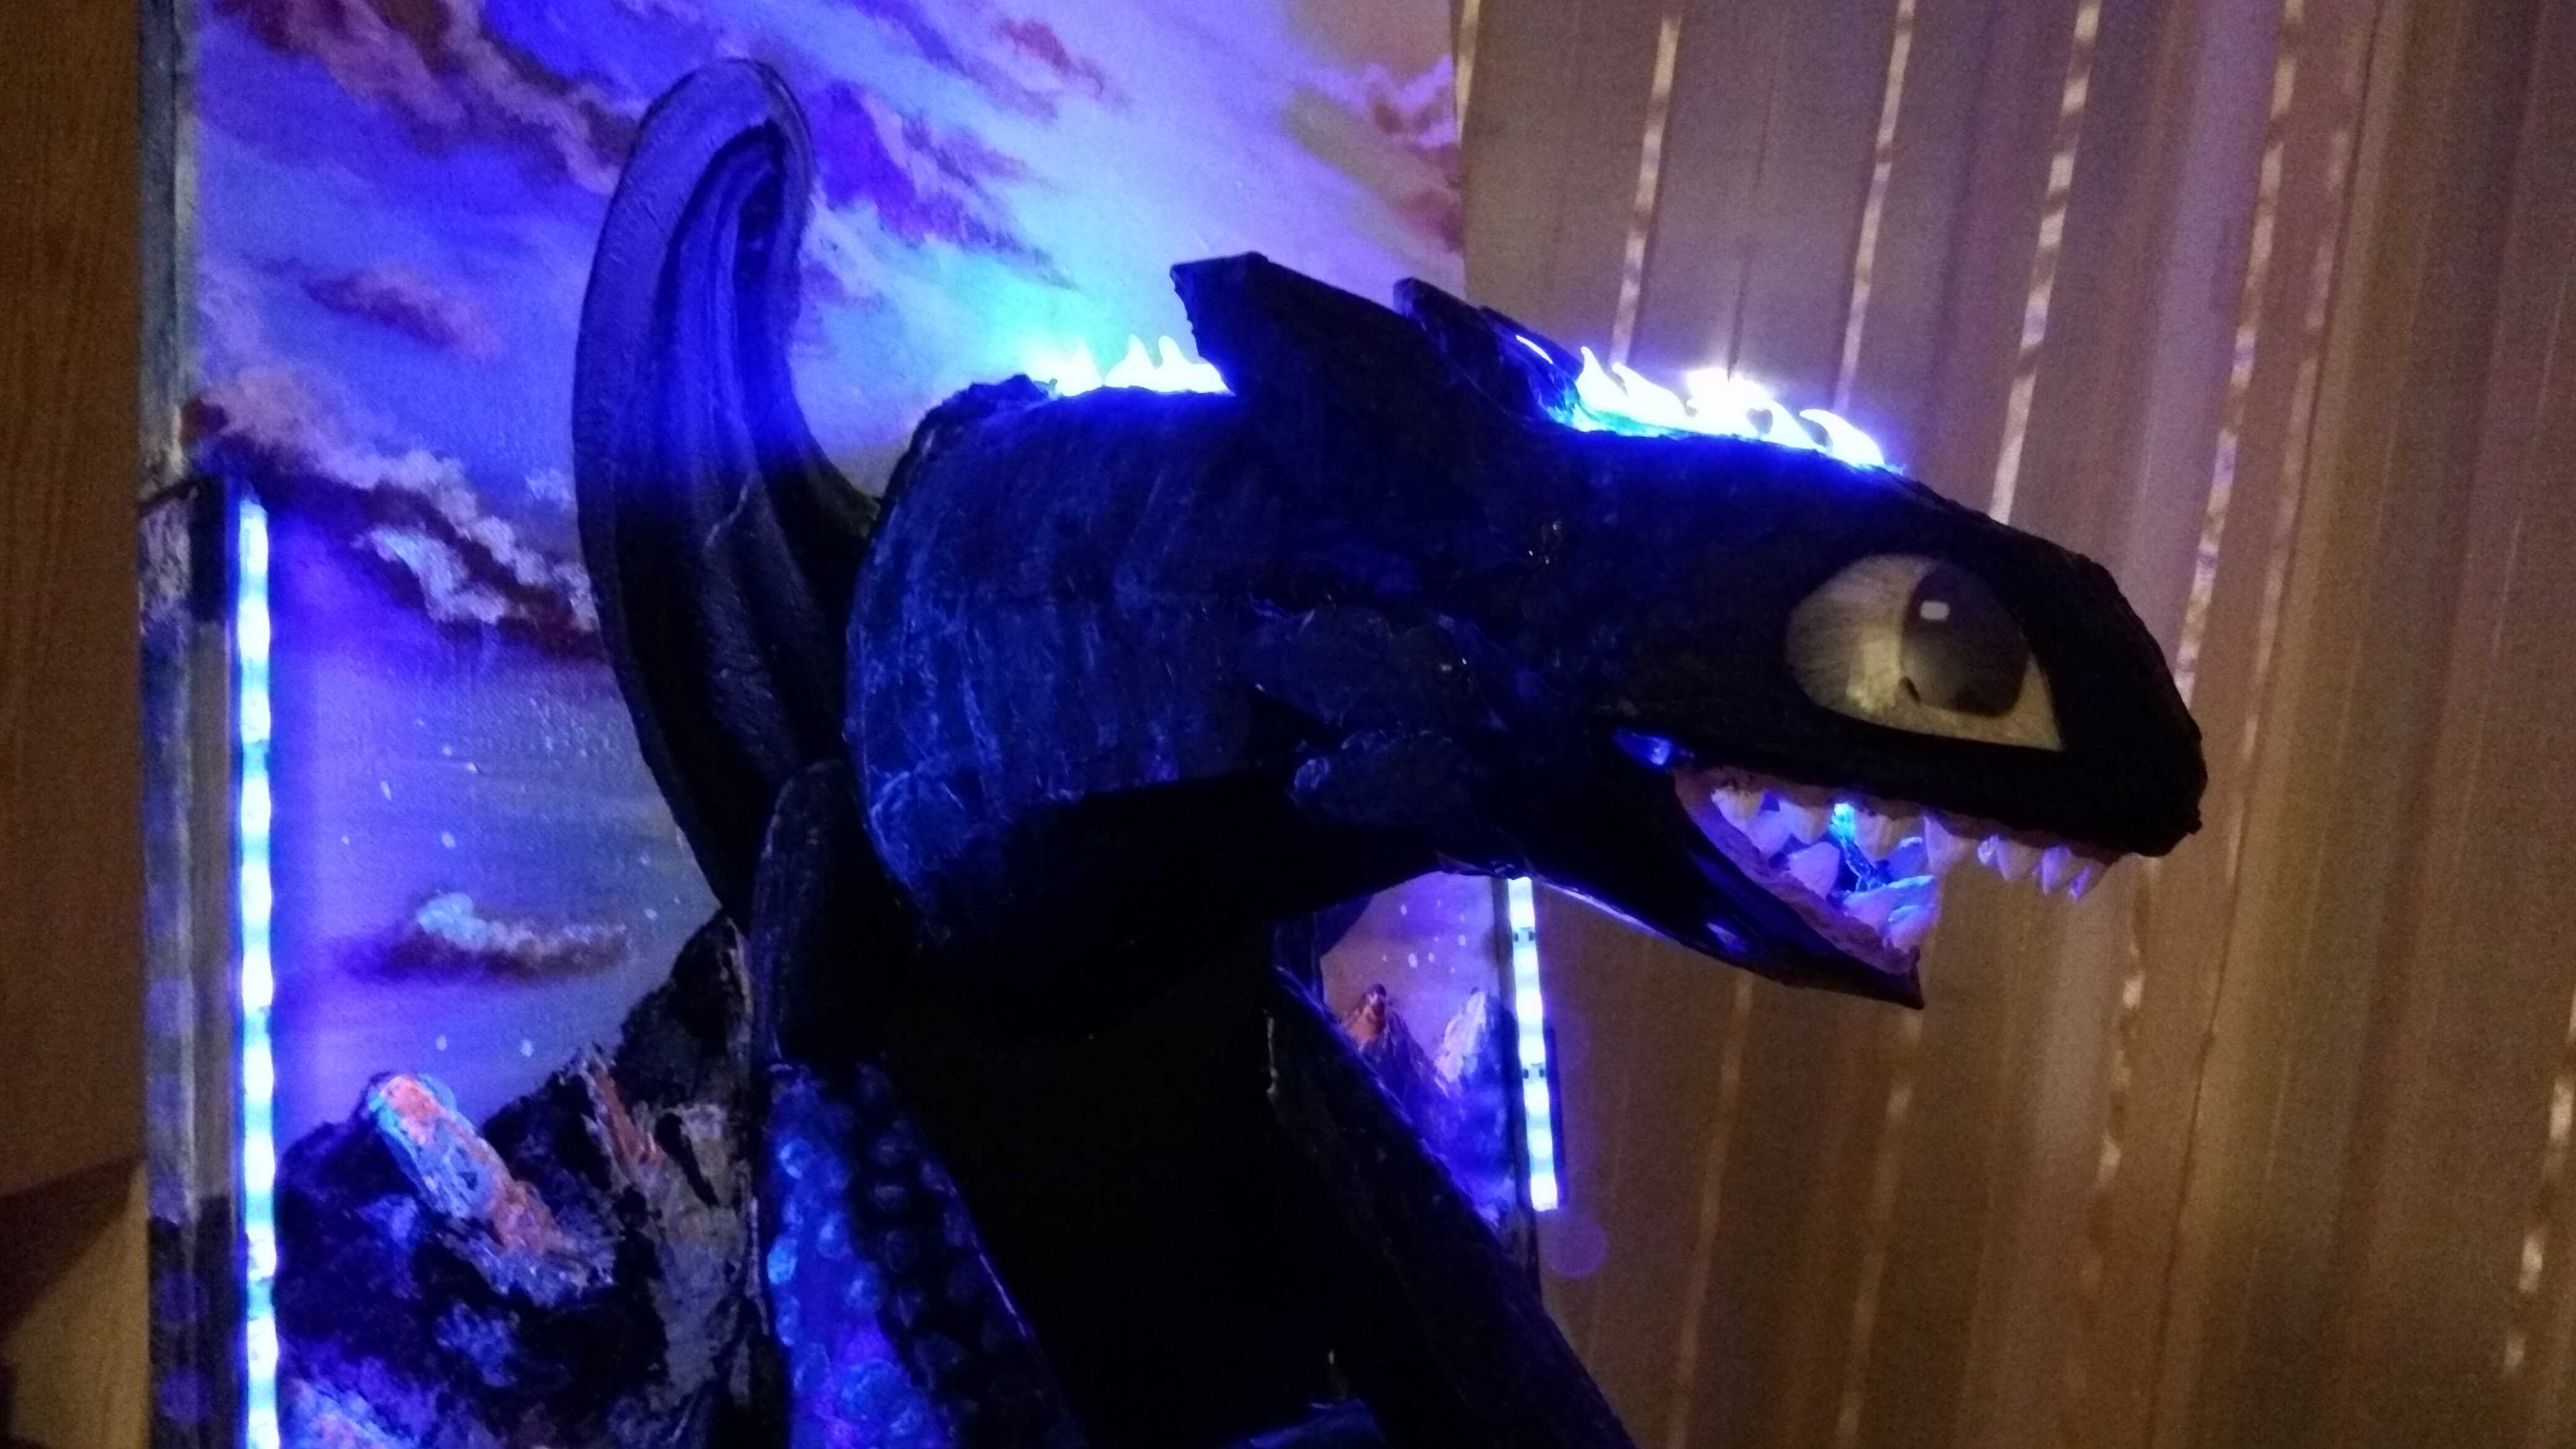
Toothless (Final)
THIS IS THE CONTINUATION OF THE PROJECT:
http://blog.familie-fratila.de/toothless-base-form/
It always takes a little time until I finish my works, but I finally made it.
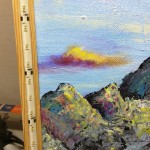
From my last post, the next step was painting the background, clouds, mountains, rock, etc.

Then I had to create back spikes from silicone, since the led strip from the back had still to be visible through the spikes. I added also the electronic parts: light resistor on the right wing, proximity sensor on the nose, side uv led strips and 2 blue leds in the mouth.


Finally the painting looks like this:

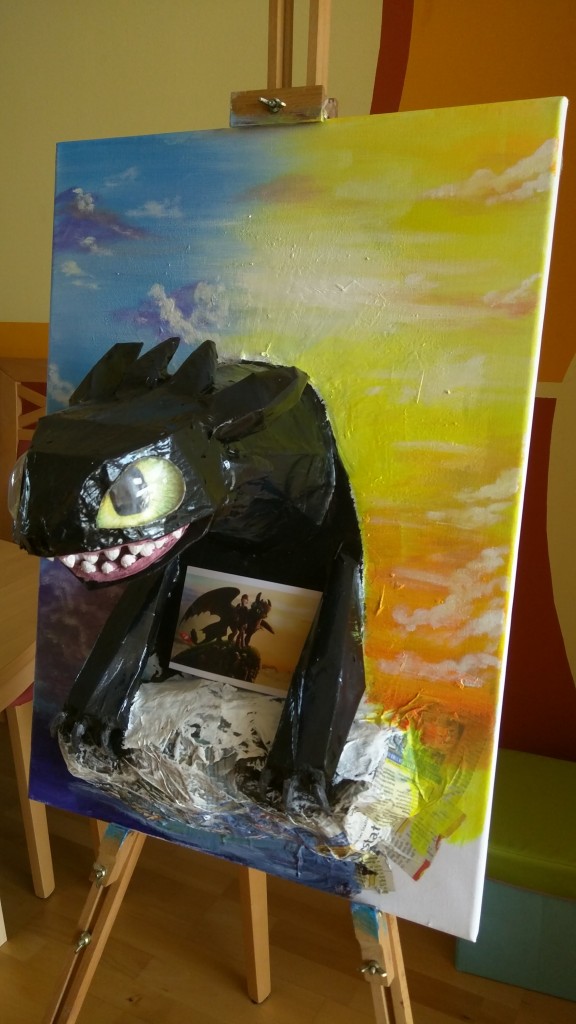
Toothless (Base form)

I guess there are not many kids theese days who don’t know him: Toothless from “How to train your dragon”. I thought I give it a try, since after the firefighter truck for my son, my daughter now also wants some “light effects” in her room.
So the original ideea was to create a Toothless model from the 2nd movie, which can also light up in blue. The final model will be a painting around a toothless model, with blue leds in the mouth to simulate the plasma, a short blue led strip on top of Toothless to light up the spines, 2 uv blacklight led strips on the side to simulate the light on the scales (which will be painted with blacklight paint) a photoresistor which detects day/night (at night it will turn on a night light by default) and an infrared distance measuring sensor on its nose, as a trigger for the “plasma” and to cycle through all programs.
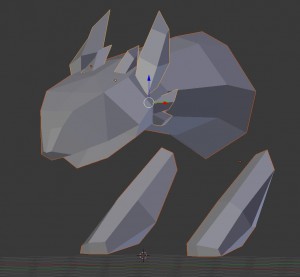
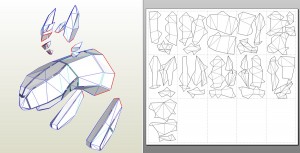

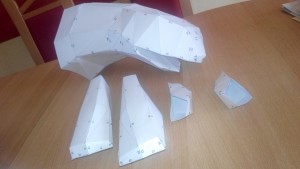
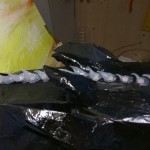
So I started to model the dragon in Blender, and prepared it afterwards for printing in Pepakura. After some hours of work it was cut out and sticked together.
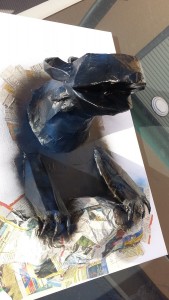
The next step was a layer of paper mache for it to get stronger, and some black spraypaint as the base color.
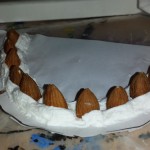
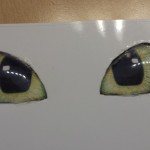
Then I used some almond seeds and again paper mache to make the teeth. And for the eyes I used a part from a plastic bottle and the printed eyes.
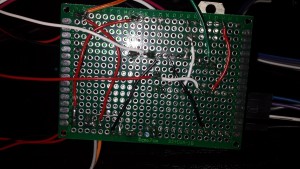
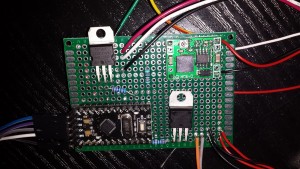
Now for the electronic part, I started to put everything together on a board. Mainly an Arduino Pro Mini will do all the tricks described at the beginning. It is easy to use and can be easily reprogrammed if changes are needed. I just really need to work on my electronics layout and soldering skills 😉
After putting it all together, it looks like this:

Like the title says, this is only the first stage I tried to finish before the vacation. It still needs a lot of work.
Todo:
- paint details on Toothles (nicer teeth, scales, uv paint, edges of eyes, edges of mouth, spines etc.)
- paint the background (mountains, rocks, tree, sky) and the rock it stands on
- put all lights on and wire all the electronics together
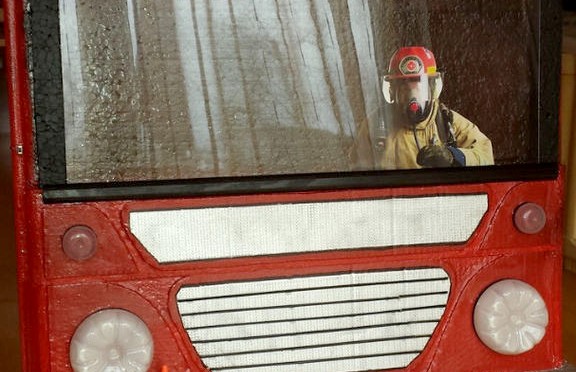
Firefighter truck painting
http://www.instructables.com/id/Firefighter-truck-painting/
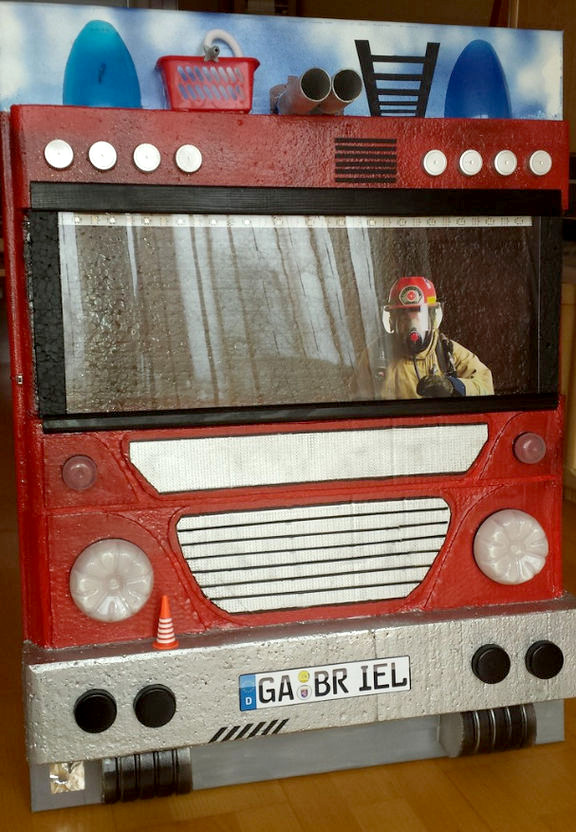
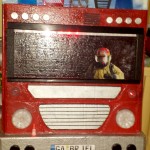
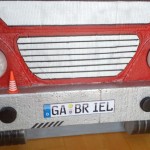
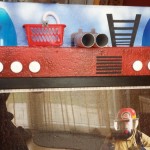
And another long overdue project of mine, which started with us painting my son’s room.
My son also wanted to have a firefighter truck painted on his wall. But since I had some electronics stuff on my mind which I wanted to try out anyway, I promised him much more than a painting.
The idea behind, is to have a somehow 3d painting, with lights, and more states of programming. I decided to go with this:
- Idle mode: all lights are off, but if the light sensor senses no light, the headlights go on 20% of their power
- Headlight mode: headlights go on 100%
- Action mode: all lights animated somehow like a real firefighter truck (see video)
Cycling through all actions is done with a touch sensor on the lower left part, near the wheel.
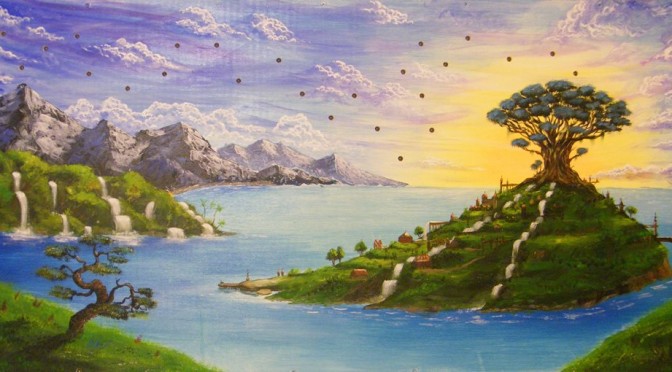
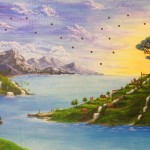
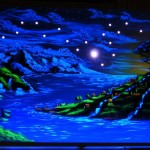
Island City – Starry Night
http://www.instructables.com/id/Island-City-Starry-Night/
This is a project I started more than 6 month ago (not much spare time in my house 😉 ). We needed something for the bedroom, which would light up automatically, and not too bright, enough to find your way into bed, and not wake the other one up, which is most of the times my wife 😉
Have seen online a lot of solutions for a starry night ceiling and paintings. Gathered all those ideas, took the best ones and put them into this one.
As soon as I discovered the potential of blacklight painting doing this painting, I knew I will probably never do a painting without it. Have a lot to learn on how to mix colors to get the nicest effects, and it really looks good in the dark (way better than all pictures I shoot with my camera).
From all the solutions for the stars I chose the fully programable rgb leds, since I wanted to be able to program some of the starts to go bright randonmly from time to time.